


DIY BOTTES MYMARANT[:]

Ah THOSE Marant boots. The other day a girlfriend asked me about my ‘relationship’ with luxury fashion. Is it frustrating working for luxury prêt-à-porter fashion houses, where I’ve been educated around quality materials and sublime finishing touches? It led me to ask myself, “Am I fashion-frustrated?”
Okay so yes and no. Yes because let’s face it, if I had the money to by incredible clothes, I’d do it in a heartbeat…but no because it’s the empty bank account which keeps me creative and drives me to make the object of my desires myself (within the limits of my own skills of course!). Then I thought, alright, what if I found an envelope filled with cash on the floor right now, and I had to spend it all in less than hour, what would I buy? (Notice that I don’t imagine winning the lottery. Oh no, I think far less realistically than that…’find an envelope full of money’…God, I tire myself out just writing it!) Well, I told myself that if I could only choose one thing it would have to be a pair of Isabel Marant boots. Ahh but no! I could never ever wear a pair of shoes worth as much as the GDP of Mozambique…
So yeah you could say it, my relationship with luxury fashion is pretty tumultuous and complicated. Anyways, that's why today I give you…MY Marant boots...and I think I get even more enjoyment out of wearing these than if I had the real deal. Without further ado, here are 24 simple steps to make my favourite DIY yet!
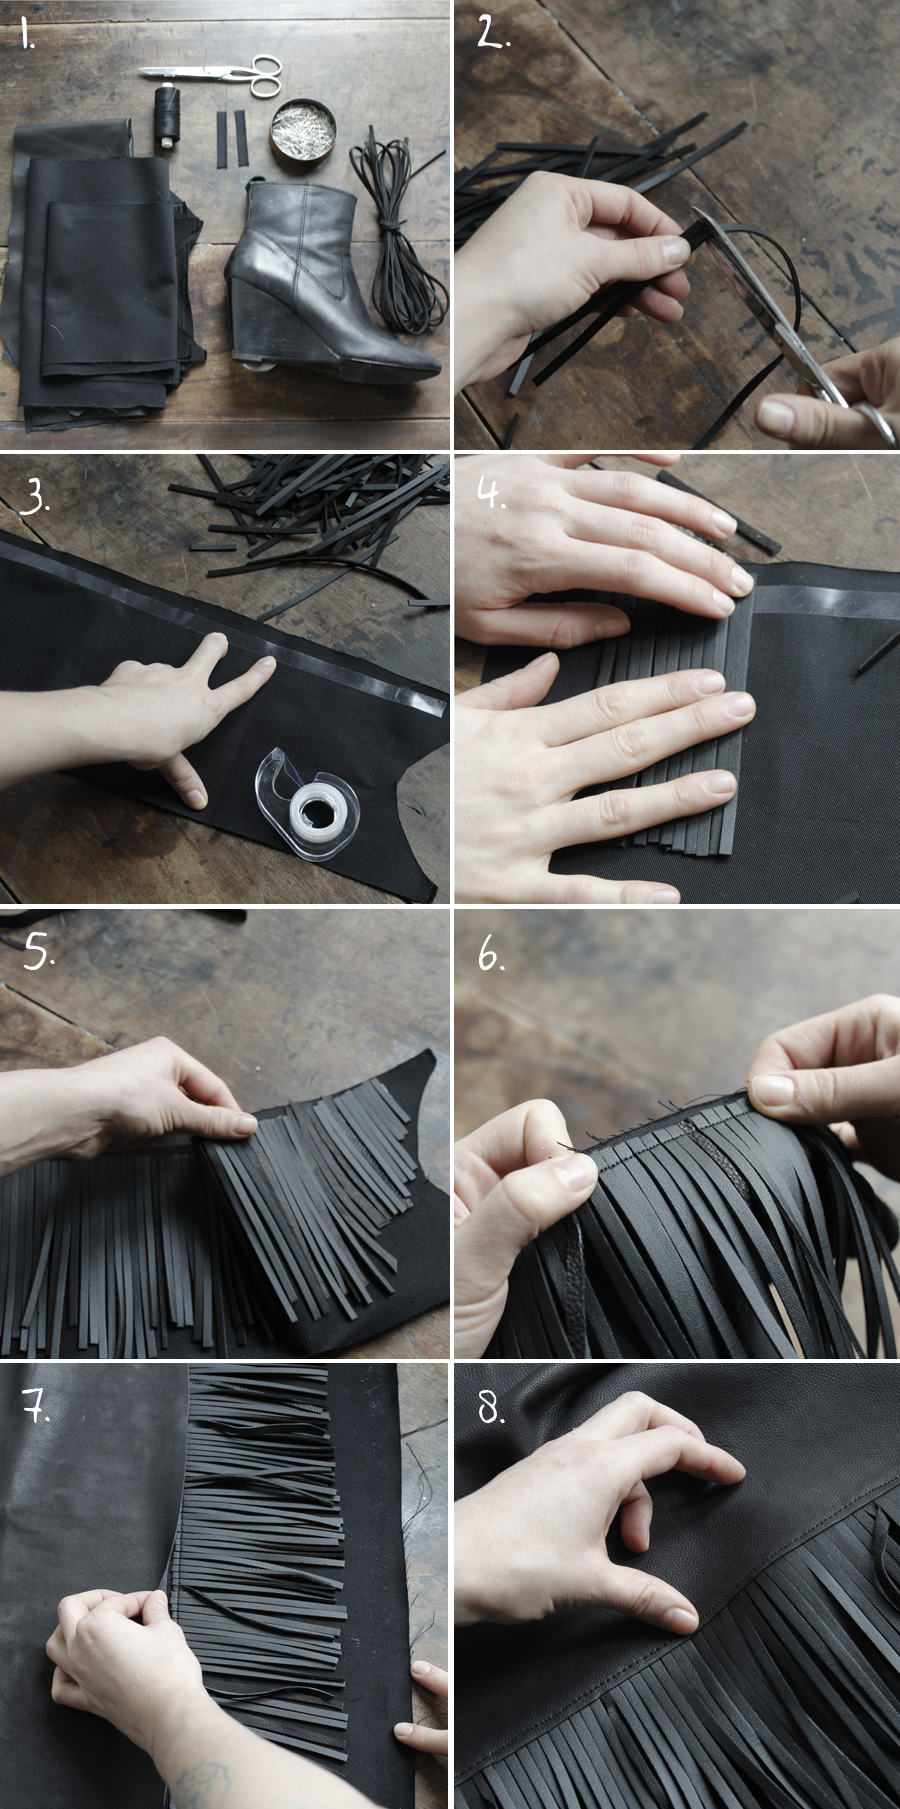
To make these boots you will need:
- -One pair of wedged boots. (Mine were from Mellow Yellow)
- -Template cuttings of leather and black gabardine (download the template pattern HERE)
- -2 pieces of elastic, each 6cm long
- - 20 strips of about 1m left over leather, available from perles d'or
- -Pins, black cord and leather needles (for both hand and sewing machine). I can’t stress enough it’s really not worth starting if you don’t have good equipment- needles and cord from fil 2000!
So, to start, cut the strips of leather into little fringes measuring about 12 cm each fig.2. To help, stick a band of double-sided sticky tape along the back part of one of the pieces of black gabardine, and put the fringes on the tape, letting them overlap a bit. You need to cover the length of the sticky tape fig 3, 4 & 5. Then sew it together using the sewing machine, making sure the machine is properly threaded with the leather needle and thread, fig 6. Take the Front leather piece and put it over the stitching of the fringing. The Front part should cover up the fringes by a few millimeters to hide the stitches fig 7. Sew the leather dead straight fig 8, so there is a blunt edge and an edge with a top-stitched seam on the outer part of the boot, the bit where the fringes are.
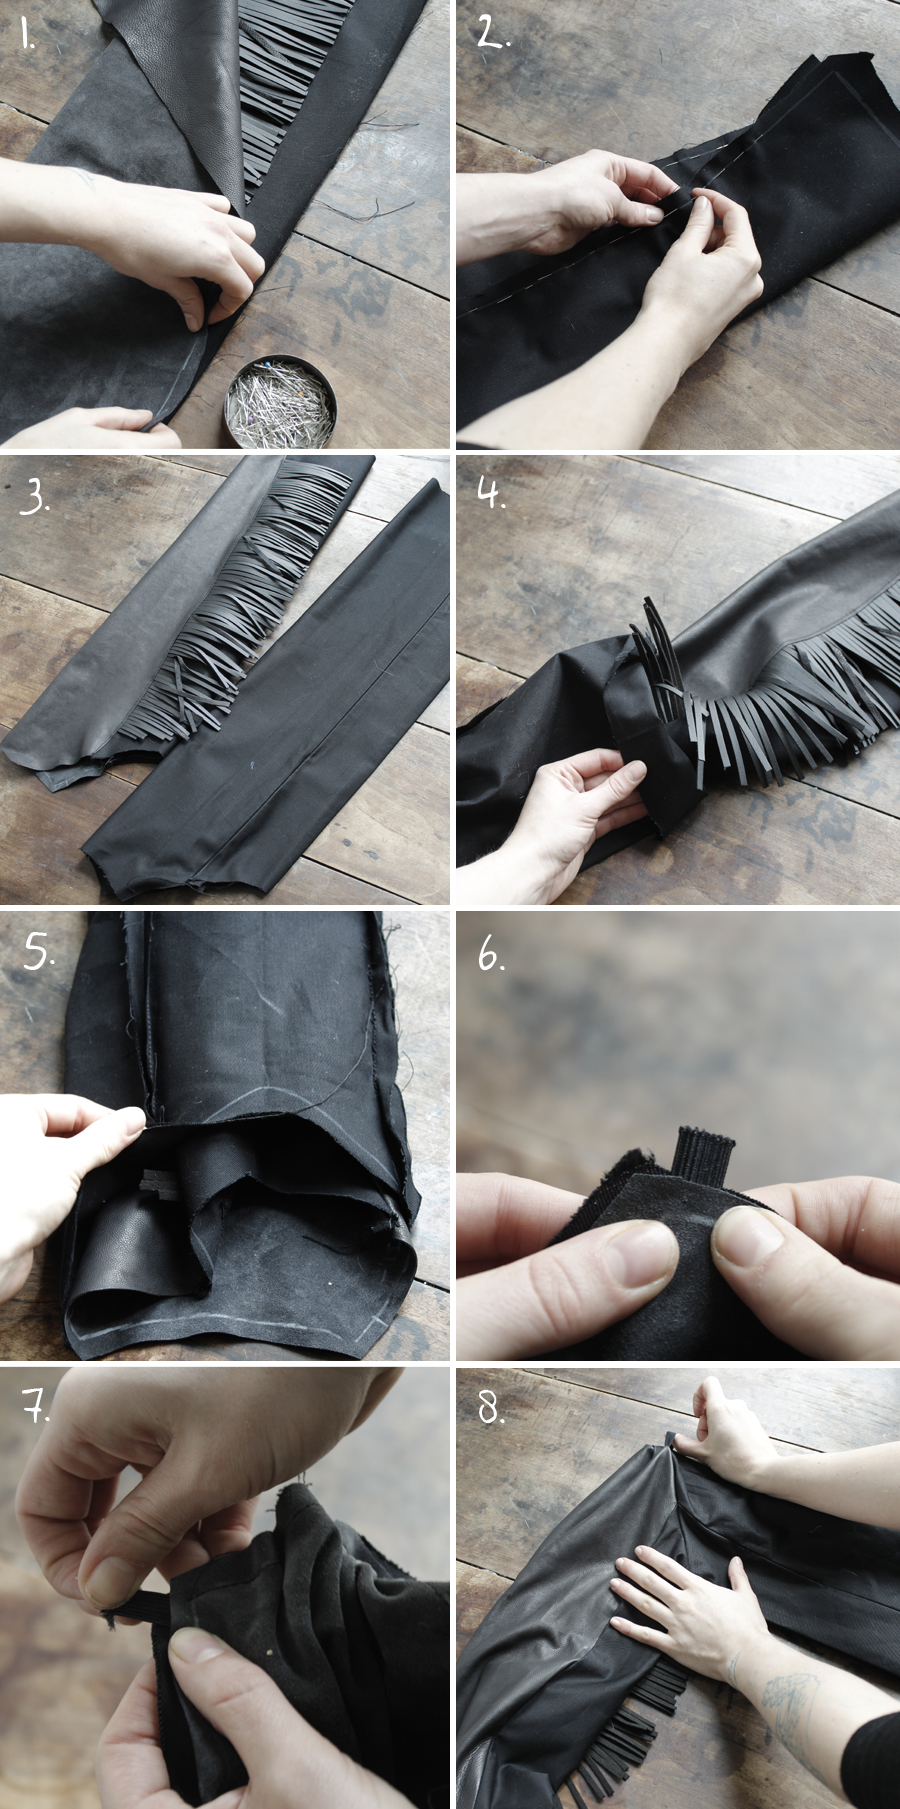
Pin the piece together to close up the boot, one edge against the other fig. 1. Do the same with the gabardine lining, fig 2, and then sew up the 2 parts. Open the pieces up at the seams and iron them, sliding them out, fig 3 & 4, (remind yourself of the technical terms here). Next, insert one part of the boot into the other, one edge against the other fig 4. Make sure the different points of the boot coincide with each other – heel, harness section etc, with the help of pins fig. 5. Then, on the Front part (indicated on the template) sandwich in the elastic and pin it together fig.6 – do the same on the other side fig 7. Sew them together, cutting slits into the curved bits, open out the corners, open the seams and smooth this over, fig. 8.
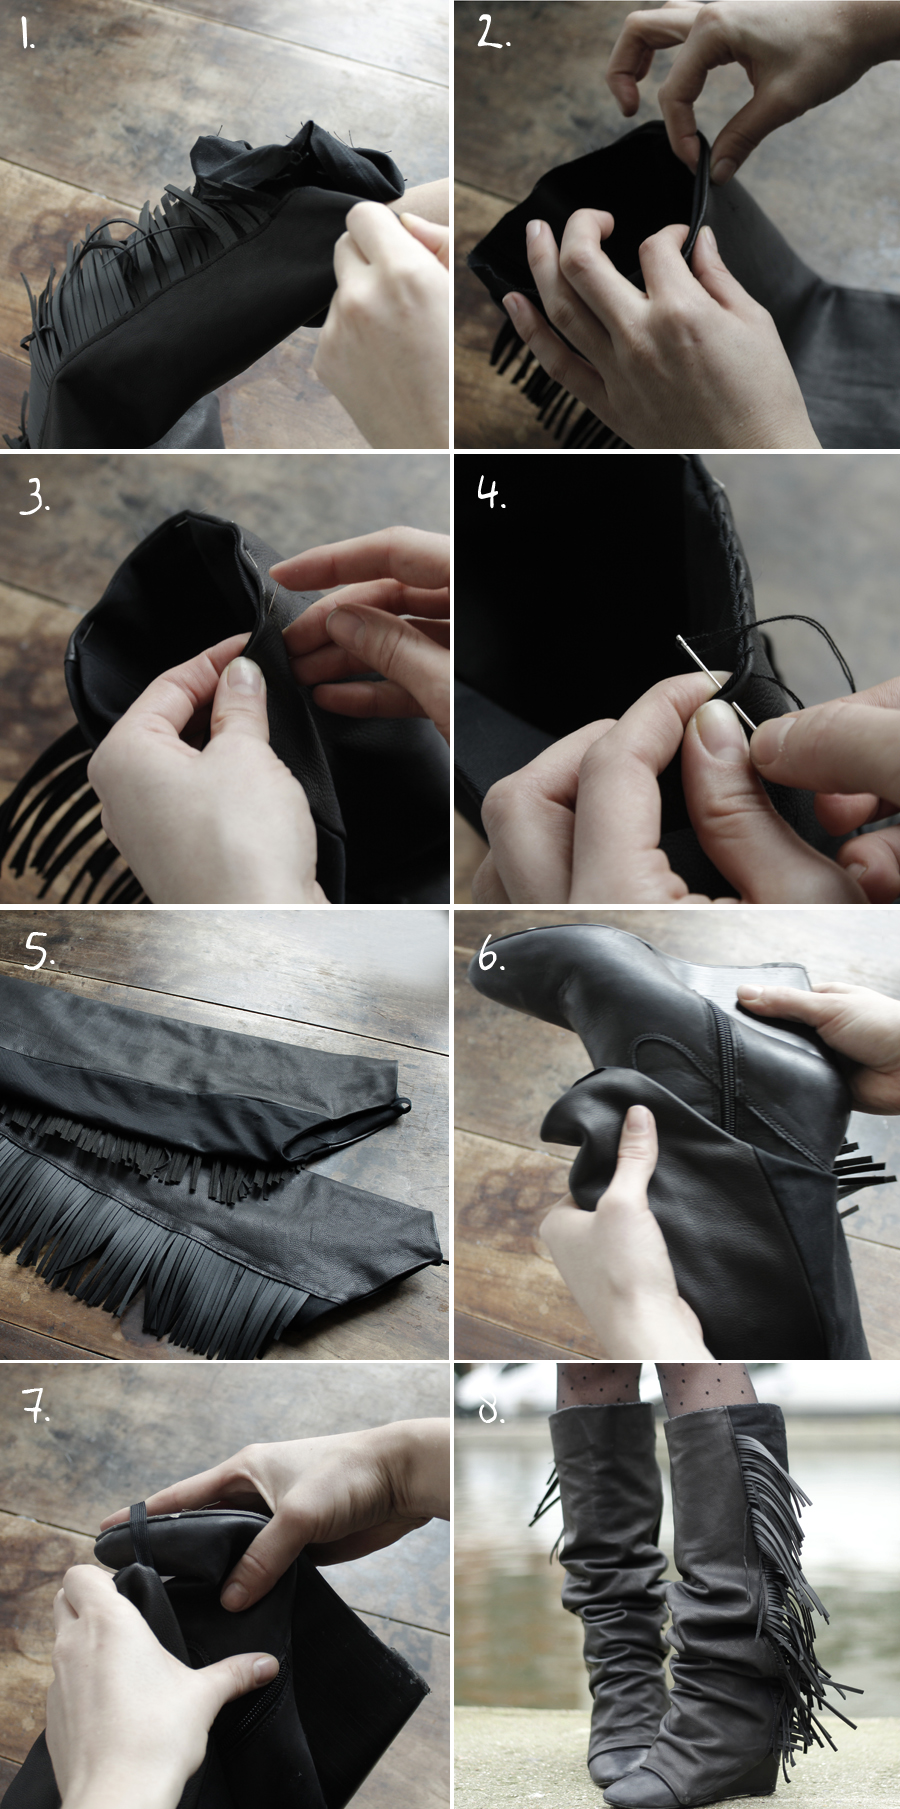
Re-insert the lining in the leather boot – fig. 1. Then to close up the boot, make two small folds around the whole circumference of the two parts, and fix one against the other with some pins fig. 2 & 3. Take a leather needle and the cord and sew around by hand, to fix the outside and the lining together fig. 4. Start again from the beginning for the second boot – you could do them at the same time if you want, hey, I’m easy, anything goes! fig. 5. Then put your boot into this leather ‘gaiter’ fig. 6, and hook them together with the help of the elastic, fig. 7. I know what you’re thinking…’but then we have to walk on the elastic?’ Yup…it’s really not that scary guys. I’ve been using mine for a week now, test-drive after test-drive…and still no sign of breaking! Anyway, if it does break I’ll just change the elastic…it’s a small detail!
And TA-DA! If you religiously follow all these steps you’ll see it’s really not so complicated!

Thanks to Charlotte E. for the photos.
[:]