


THE DIY TO THANK YOU MY KITTENS !
Happy Wednesday you beauties!
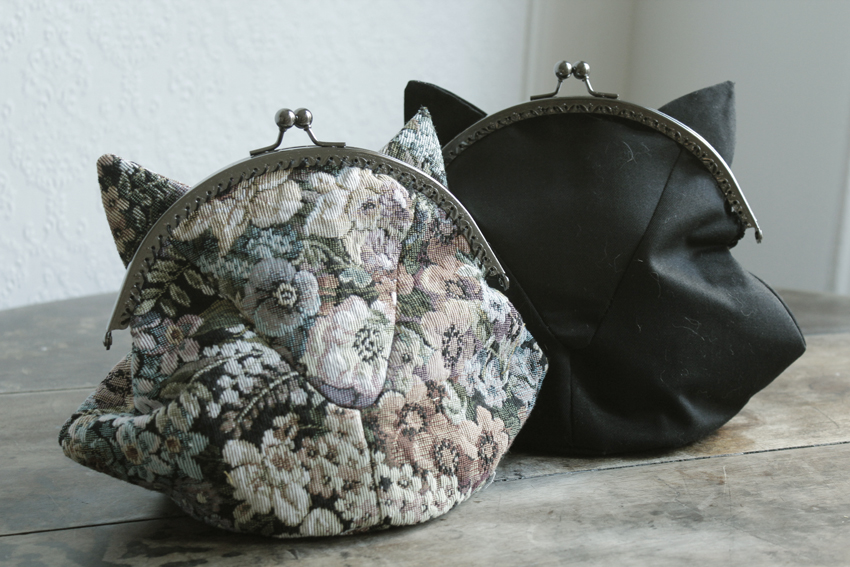
I have a real treat in store for you today; something I know will make some of you very happy! I told you on Saturday about the famous Etsy competition from last Christmas and, after this article and more particularly after this image on my inspiration board, I literally received hundreds of frantic mails, hysterically asking about the cat clutch. Nobody could live without knowing where it was from! And so, after hours of research I finally found the source of this oh-so-popular bag (sorryyy, I don’t have the link any more…change over of computers and all that…mea culpa!) But it was from a Japanese site and came in pale pink as well…aaaand it’s been sold out for a few months. Ah but don’t worry your pretty little selves! I’m going to show you how to make one yourself in this DIY…better still this is a thank you DIY, because yes, as is the tradition for every 1000 new likes on the Facebook page, I have a little contest for you guys just to say “thank you!”.
So, there we go my little cats, as a small thank you I am giving you the opportunity to win a little kitten clutch in black or a floral tapestry – just comment me, letting me know which one you’d prefer, and then ask me any question at all…something that’s been bugging you or you’ve been meaning to ask me for a while - I’m going to make a small ‘Frequently Asked Questions’ (FAQ) section to put on the site! Big hugs to you all, and thank you yet again! I’ll pick the winner out of a hat at midnight on Friday and will publish the winner’s name at the end of this article.
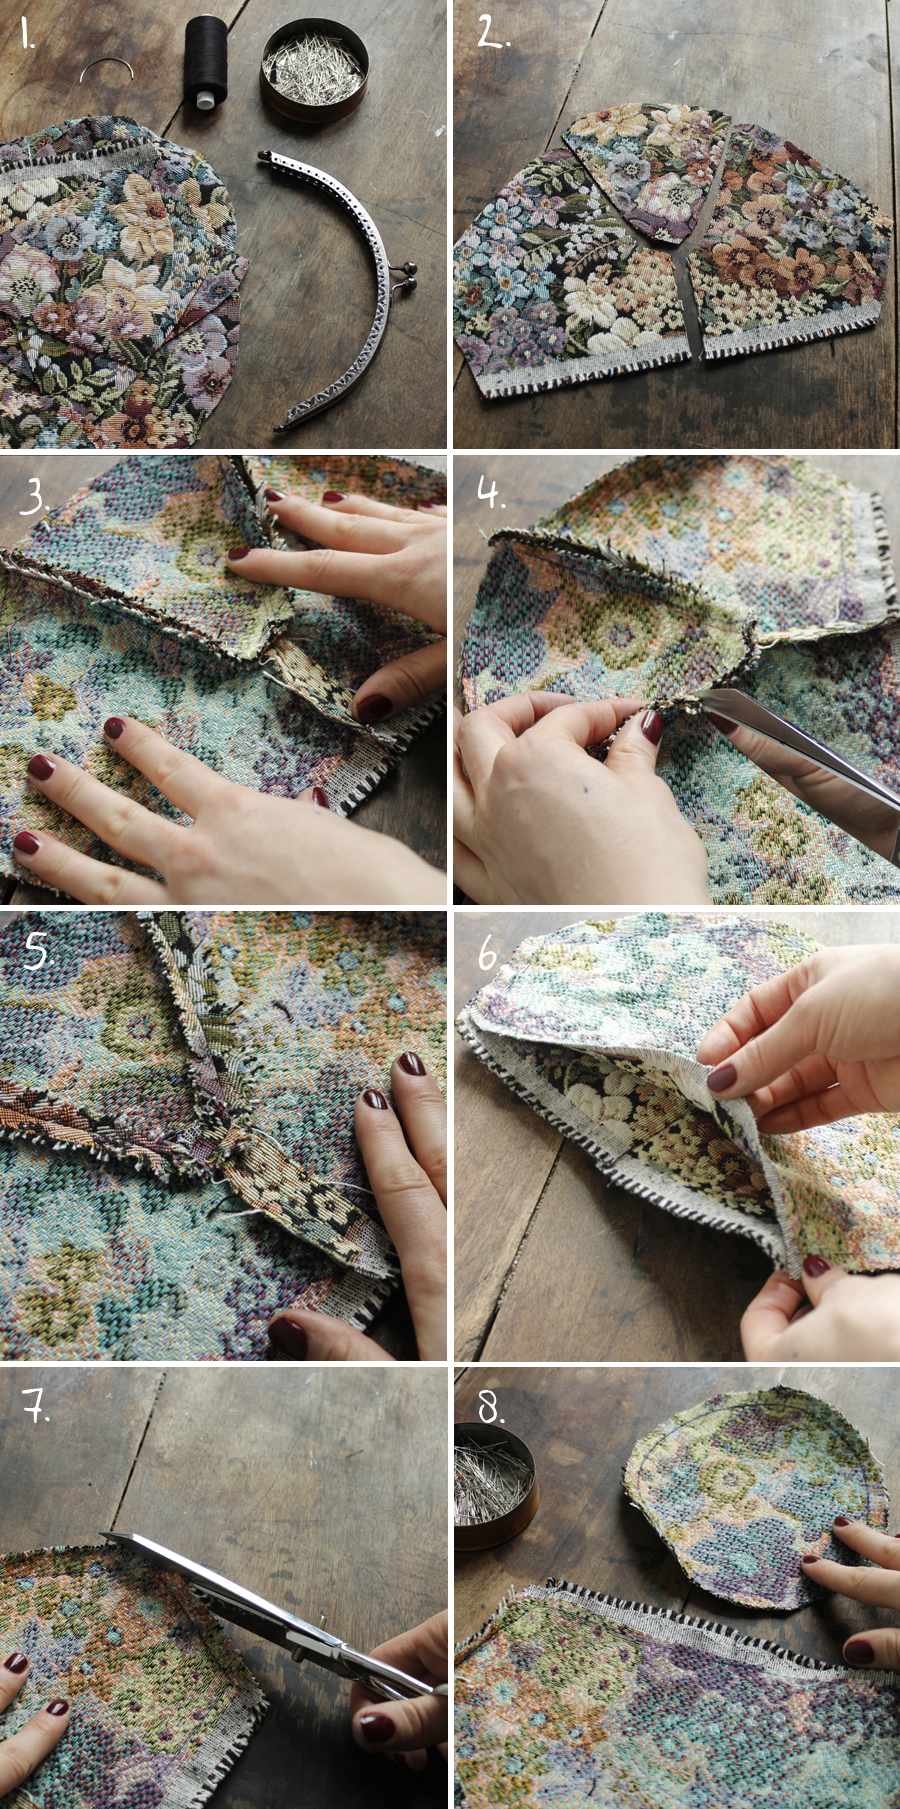
So, to do this DIY you need:
- -To download the pattern HERE
- -The parts of the bag cut out from a thick canvas
- -A bag clasp, like the ones you find on purses, which can be bought from Moline haberdashery at St Pierre market
- -A curved needle and a normal one, as well as a thread of chord
- -Pins
- -A pair of scissors.
To start off, pin the 3 front parts to form the muzzle of your kitten! fig.2 Then sew with the machine, fig. 3. Clip each of the curved seams, fig 4. With the help of an iron, open up all the seams, fig. 5 Then pin the back and the muzzle/front together, and sew fig.6 Clip the corners of the sides, fig.7 and then open the seams with the iron. Now take the bottom of the clutch for the next part.
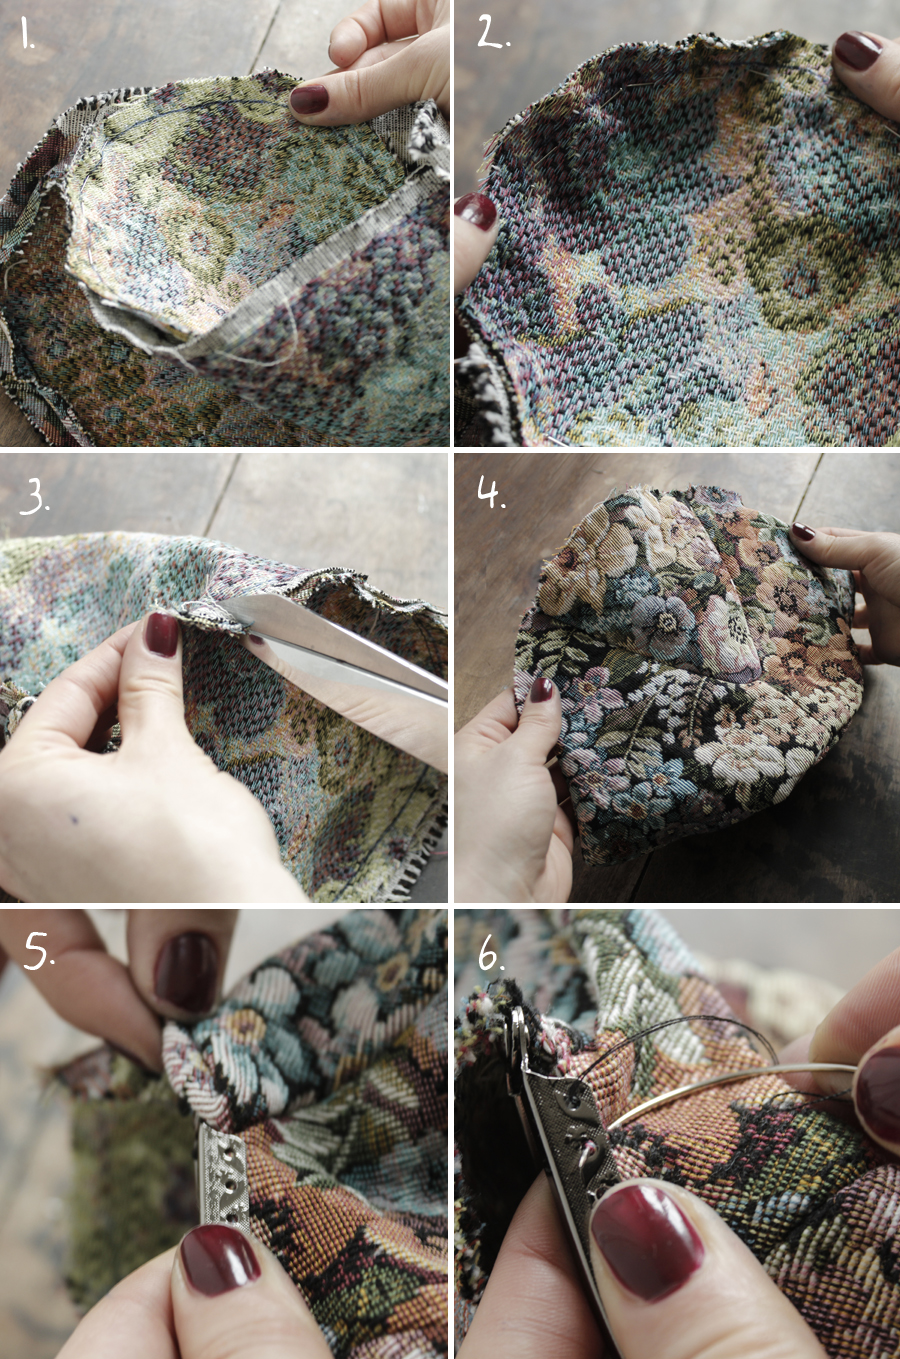
Pin the bottom of the clutch to the front/muzzle and the back, fig. 1&2. Sew the bottom of the clutch using the machine, then clip along the whole of the seam at about 1.5 cm intervals, fig.3 Open the seams with the iron…beginning to get the picture? And then turn the purse the right way round, fig.4 Attach the clasp to the material, fig.5 the metal has to sandwich the material and then with the help of the curved needle and thread, start to sew the clasp to the clutch, fig.6
And now for the final stages…you see it’s not so hard to make your own little kitten purse! For the ears, pin together the front sides of the front and the back of the ears, fig.1 then sew them together, and clear up the points of the ears, fig.2 Turn the ears the right way round, fig.3 and with the help of a pin turn up the frayed edges of the bottom of the ears and fix the front and the back together with your trusty pin! fig.4 Place the ears on the back of the clutch and to sew the ears on, I’d advise you to open the clutch, fig.5 & 6. With the help of the normal needle and the thread, fix the ears to the back of your clutch, fig.7 and TA-DA, fig.8! A little extra which makes all the difference! To make a little lining for the purse, just follow all the steps again, except the ears. And if you want your purse to become a bag, there is nothing to stop you from sewing two rings behind the ears to attach a chain strap. And a last little tip…I recommend choosing quite a thick material, so that your clutch stays strong, or alternatively strengthen your material by ironing on a stick-on thicker material inside!
Get to your scissors, and start sewing!

The winner of the competition is: Lullaby – she has already been emailed, and it won’t be long ‘til she receives the tapestry clutch! Lots of kisses, and I will respond to all your questions very soon! Lots of love!