


DIY PAPER BEE[:]
Happy Tuesday, my darlings,
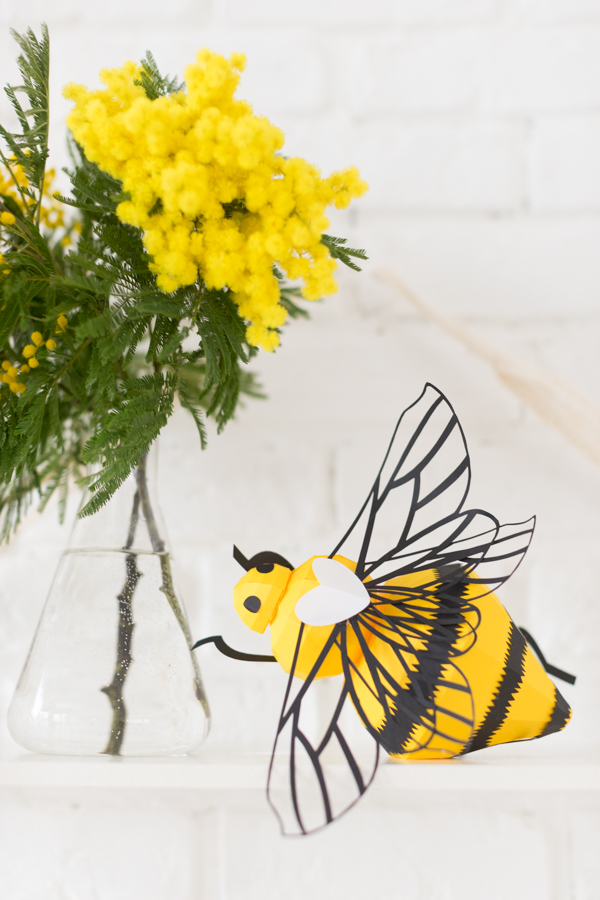
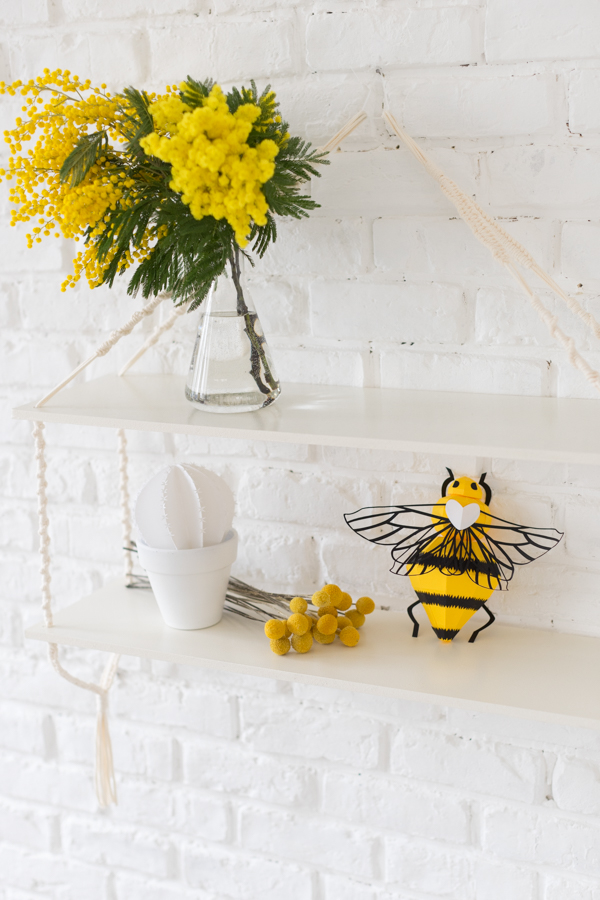
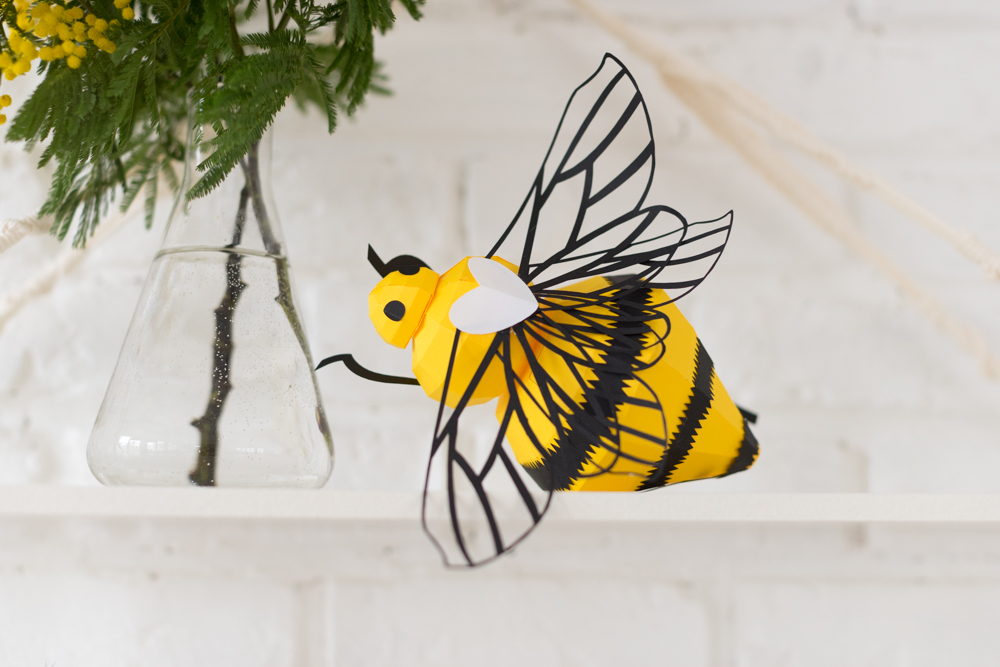
As you may already know, the new Wear Lemonade collection is out! It’s inspired by sunny days, mimosas and bees (of course)! I couldn’t miss out on this opportunity to create a paper bee to decorate your wall or desk... And the lovely Julie came up with a great idea: it can also go on a baby mobile. Since it’s Valentine’s Day, you can also give it as a gift, saying “bee my valentine”... Anyways, you get the idea, this bee is super useful! I’ve wanted to make bugs out of paper for a while now, after seeing Zim and Zou’s and Assembli’s amazing kits. This collection is just the perfect chance to make some! Don’t worry, it’s pretty easy to put together, and I promise that after this, making things out of paper will be simple for you. I’ll let you get to it, hugs and kisses!
Charlotte

I suggest printing the pattern out on thick, white paper for the black parts and to cut them out without tracing them on another piece of paper.
- The patterns, download here,
- Thick, colored paper (we used some from Clairefontaine),
- Scotch glue, in the green tube
- A small ruler
- An exacto knife
- A pair of scissors.
Print and cut all the patterns out of colored paper, being careful of the number written on each part.
Using an exacto knife and ruler, trace all the folding lines with the back of the blade (the fold lines are indicated on the patterns).
Now fold all your lines! Glue the D and E cut-outs together. The E part has a hole so that you can hang your bee to a wall by sliding the nail head through it. If you don’t plan on hanging it on a wall, you can cut the D part nine times instead.
Put glue on the first two tabs and glue them to the following section. Wait a few minutes for them to dry and glue the next tabs together to hold the two sections together!
Keep doing this and the bee’s body should start to take shape. Don’t forget to assemble the E part with the rest of the body. The hole on this part will help you hang your bee on a nail in a wall. To finish off the bee’s body, glue the A and G cutouts to the edges.
Let’s move on to the F part! Follow the same pattern as the bee’s body. I suggest putting four sections of one part together and four sections of another together, then slide them together and glue. Don’t forget to close off the shape by gluing the C part!
Let’s finish it off with the bee’s head (H). Once that’s done, most of the work is done! Glue the tabs to each other and the head will start to take shape, finish off with the B cutout to close off the volume.
Bravo! Pat yourself on the back and take a snack break!
Using the cutouts of the bee’s stripes, trace folding lines if you haven’t already. Fold and make sure that the folds line up with the bee’s shape! All you have left to do is glue them to the body! I suggest gluing the ends of the stripes next to the side that has a hole. You won’t see this side as much, so don’t worry if the stripes don’t line up exactly!
Now fold the two circles that serve as the bee’s eyes and glue them on top of it’s head.
Glue the body, abdomen and head together!
Fold the heart in half, which’ll go on the bee’s abdomen and will hold the wings in place.
Glue together the large wings on the the little ones, lining them up on the red mark indicated on the pattern.
Now attach your wings to the heart, angling them however you like.
Finish it off by gluing the heart to the abdomen and ta-da! Now you just have to find a place for your new friend!
 Musique : Santoré - Another Man
Translated by Whitney Bolin[:]
Musique : Santoré - Another Man
Translated by Whitney Bolin[:]