


DIY ORGANIZER BOARD[:]

Hello my little kitties!
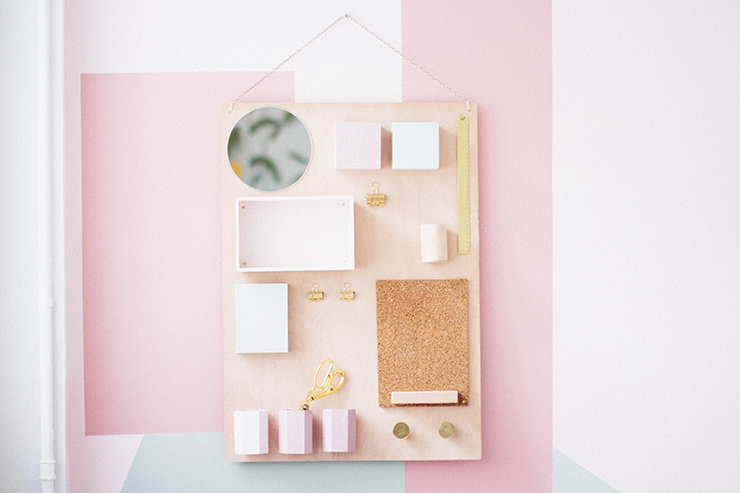
I am back today with a nice DIY! A long time ago, I had a crush on this office organizer on the Anthropologie website but it cost around $300. I was not really convinced at that time… so I decided that I could do it myself! I found on Internet many wooden objects and I was thinking about how to put them together on this board in order to make it invisible. Sometimes, I spend so much time finding the perfect solution that I almost cannot sleep at night! Then, I decided “I am going to stick them together with some glue for wood”. However, it was a bit too easy for me…and I wanted to do a real DIY for you guys…
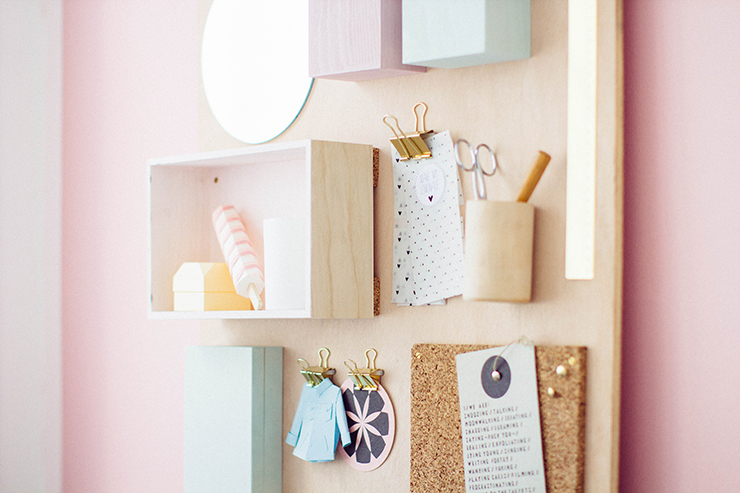
While doing completely something else, like Doctor House, I finally found the solution! The plastic clamp collar was the key, and believe me this little object can resolve many problems. We all need to have some in our toolbox! Now, it is time to show you the DIY of the office organizer!

Time: an afternoon
Cost: around €30
Difficulty: easy (ask for help with the drill if needed)
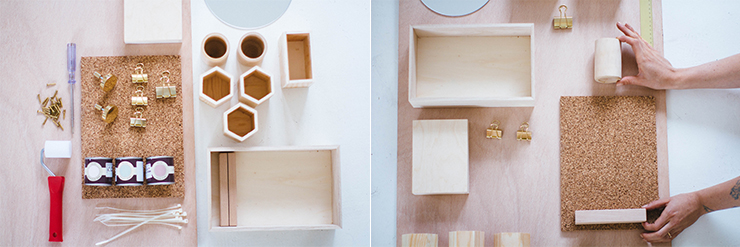
For this DIY, you need:
- - a wooden board
- - small wooden boxes and pots (found here)
- - drawing clips (different sizes)
- - a drill
- - some screws
- - plastic clamp collars
- - a small roller
- - paint (here some Farrow & Ball samples: Middleton pink, Nancy's Blush et Teresa) Green
- - a pen
- - adhesive tape (double sides)
- - an Ikea mirror
- - a corkboard
- - sandpaper
- - screwdriver
- - 2 door knobs
- - a chain with small links
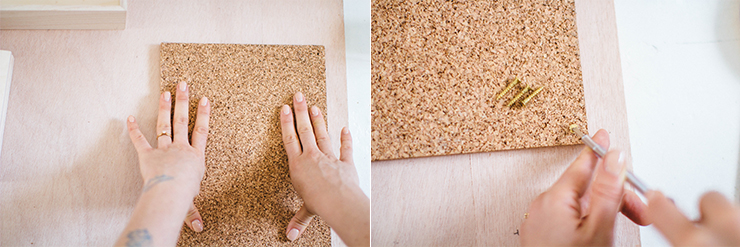
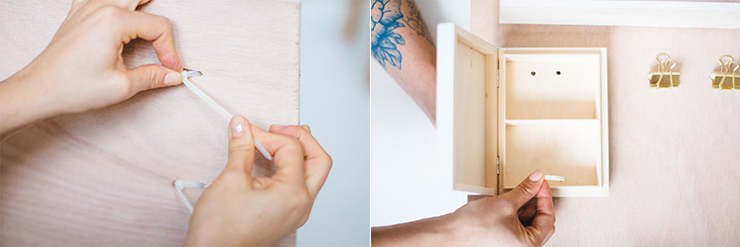
To start, display the elements you want to fix on the wooden board and define their place. You can take a picture with your phone if you do not want to forget.
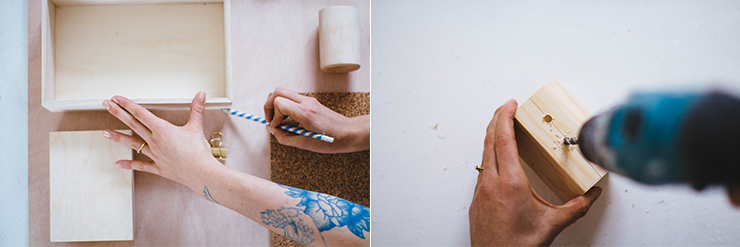
Mark the place of each element with a pen and measure the space between them with a ruler. Drill two holes in your pen pot (or more depending on the size of the elements but it always has to be an even number).
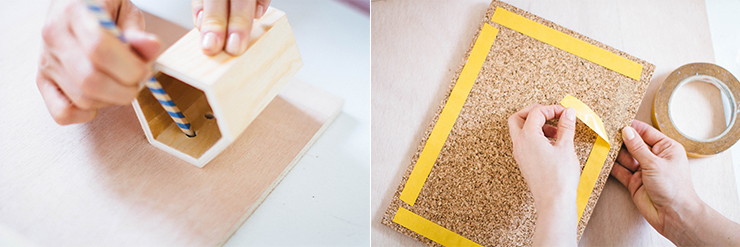
Drill the holes, put the pot at its right place and mark the holes on the wooden board. For the corkboard, on which you will pin what you want, you just have to put some adhesive tape (double sides) to fix it.
Stick the corkboard to the place you want. Then, use four screws to fix each angle in order to have nicer finishing touches! For the mirror, you can also fix it with adhesive tape (double sides).
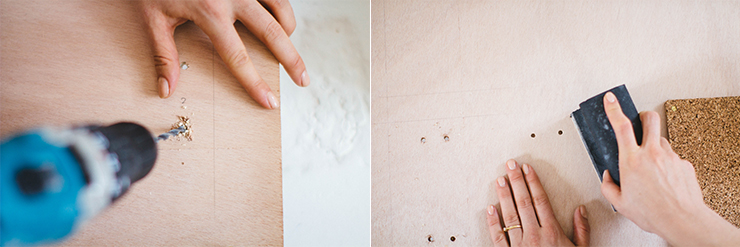
Once the mirror and the corkboard fixed, drill the holes you previously marked on the board. Do not forget to use some sandpaper after. Indeed, it is better to sandpaper the lines you wrote on the wooden board than use an eraser because it will mark the board!
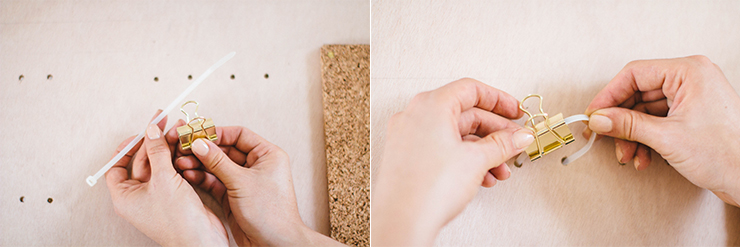
Take a plastic clamp collar and put it in the first hole of the element (from the back of the board to the front), place it in the drawing clip and then pass it through the second hole.

Tighten the plastic clamp collar and do not forget to cut it! For the door knobs, screw them behind the board.
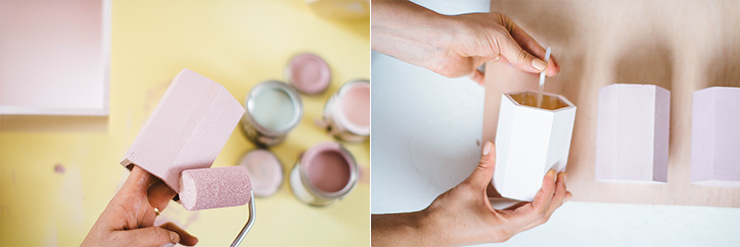
Painting time! Paint your wooden objects in the color you prefer using a small roller to avoid traces. Then, fix it thanks to a plastic clamp collar (same as for the previous step with the drawing clip).
As I said before, you will sometimes need more than 2 holes per element and it is the case for this small box! Continue to fix your elements with plastic clamp collars (easy, isn’t it?).
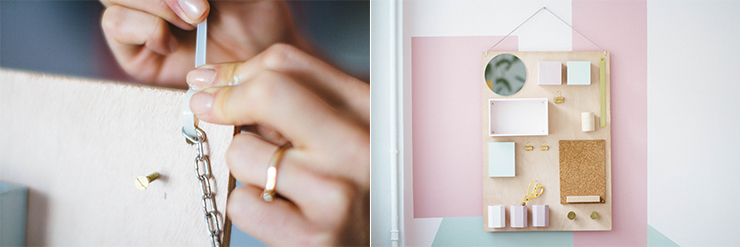
To fix the office organizer board, drill two holes in the angles (not too close from the edge) and hang a chain, once again, using plastic clamp collars (so useful)! Here we are!
Translated by Coralie Clair
Pour lire ce post en français, cliquez ici !
[:]