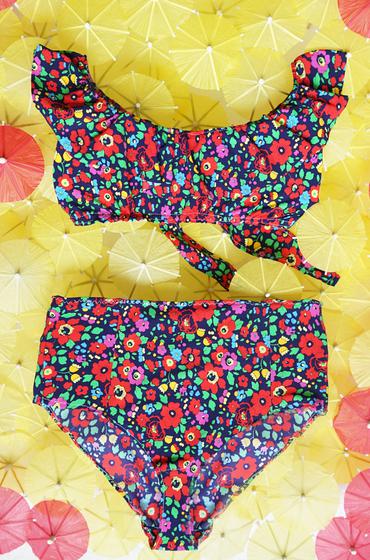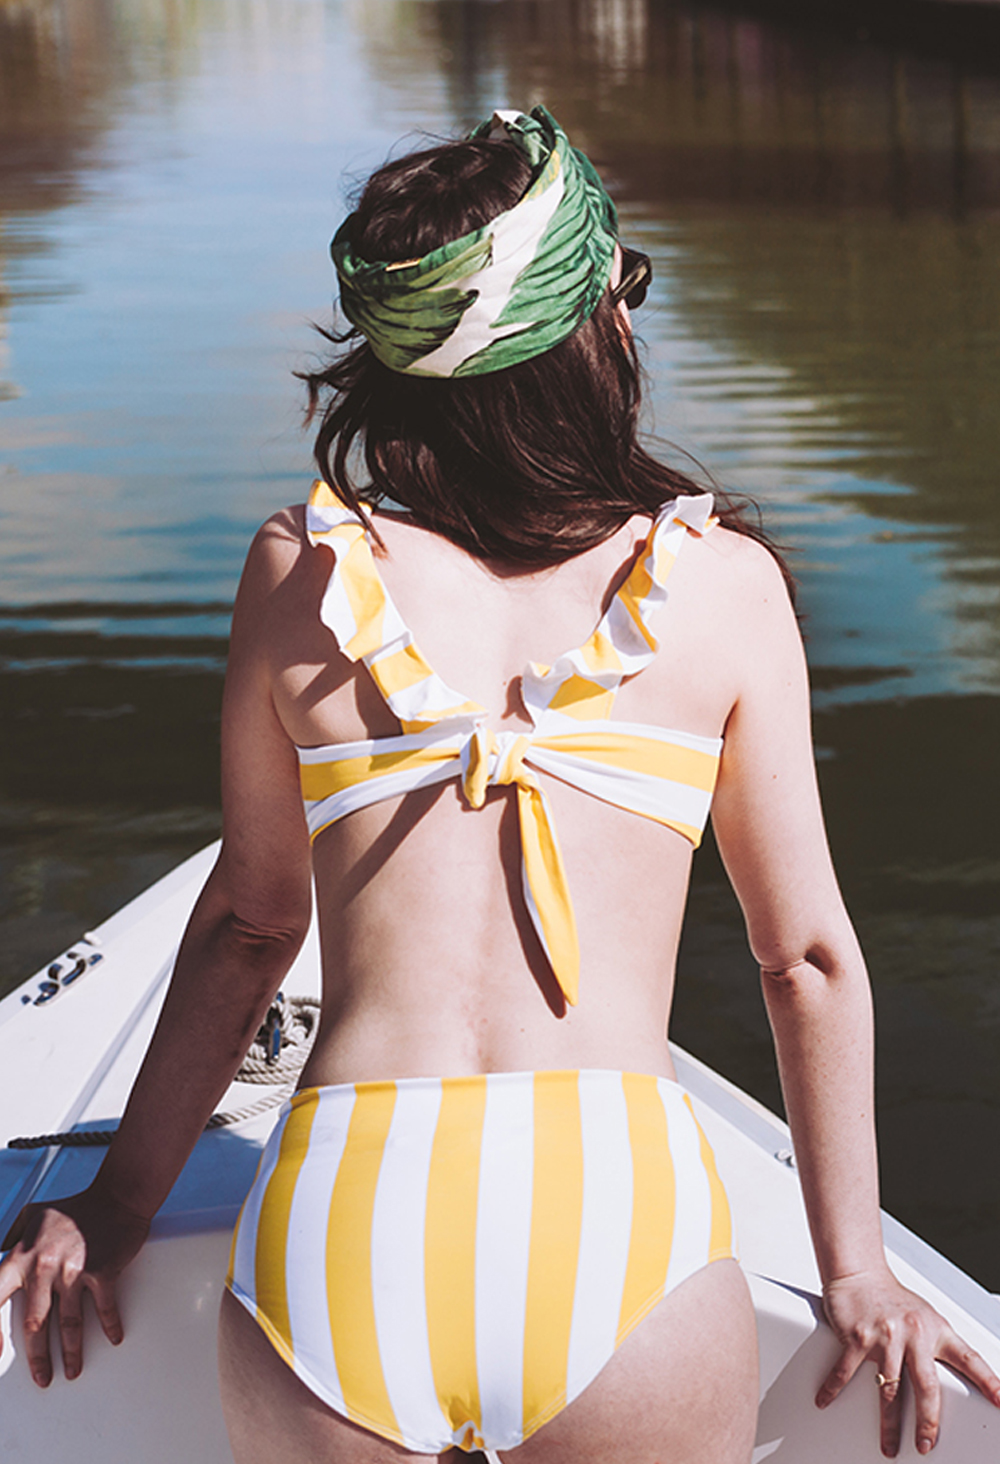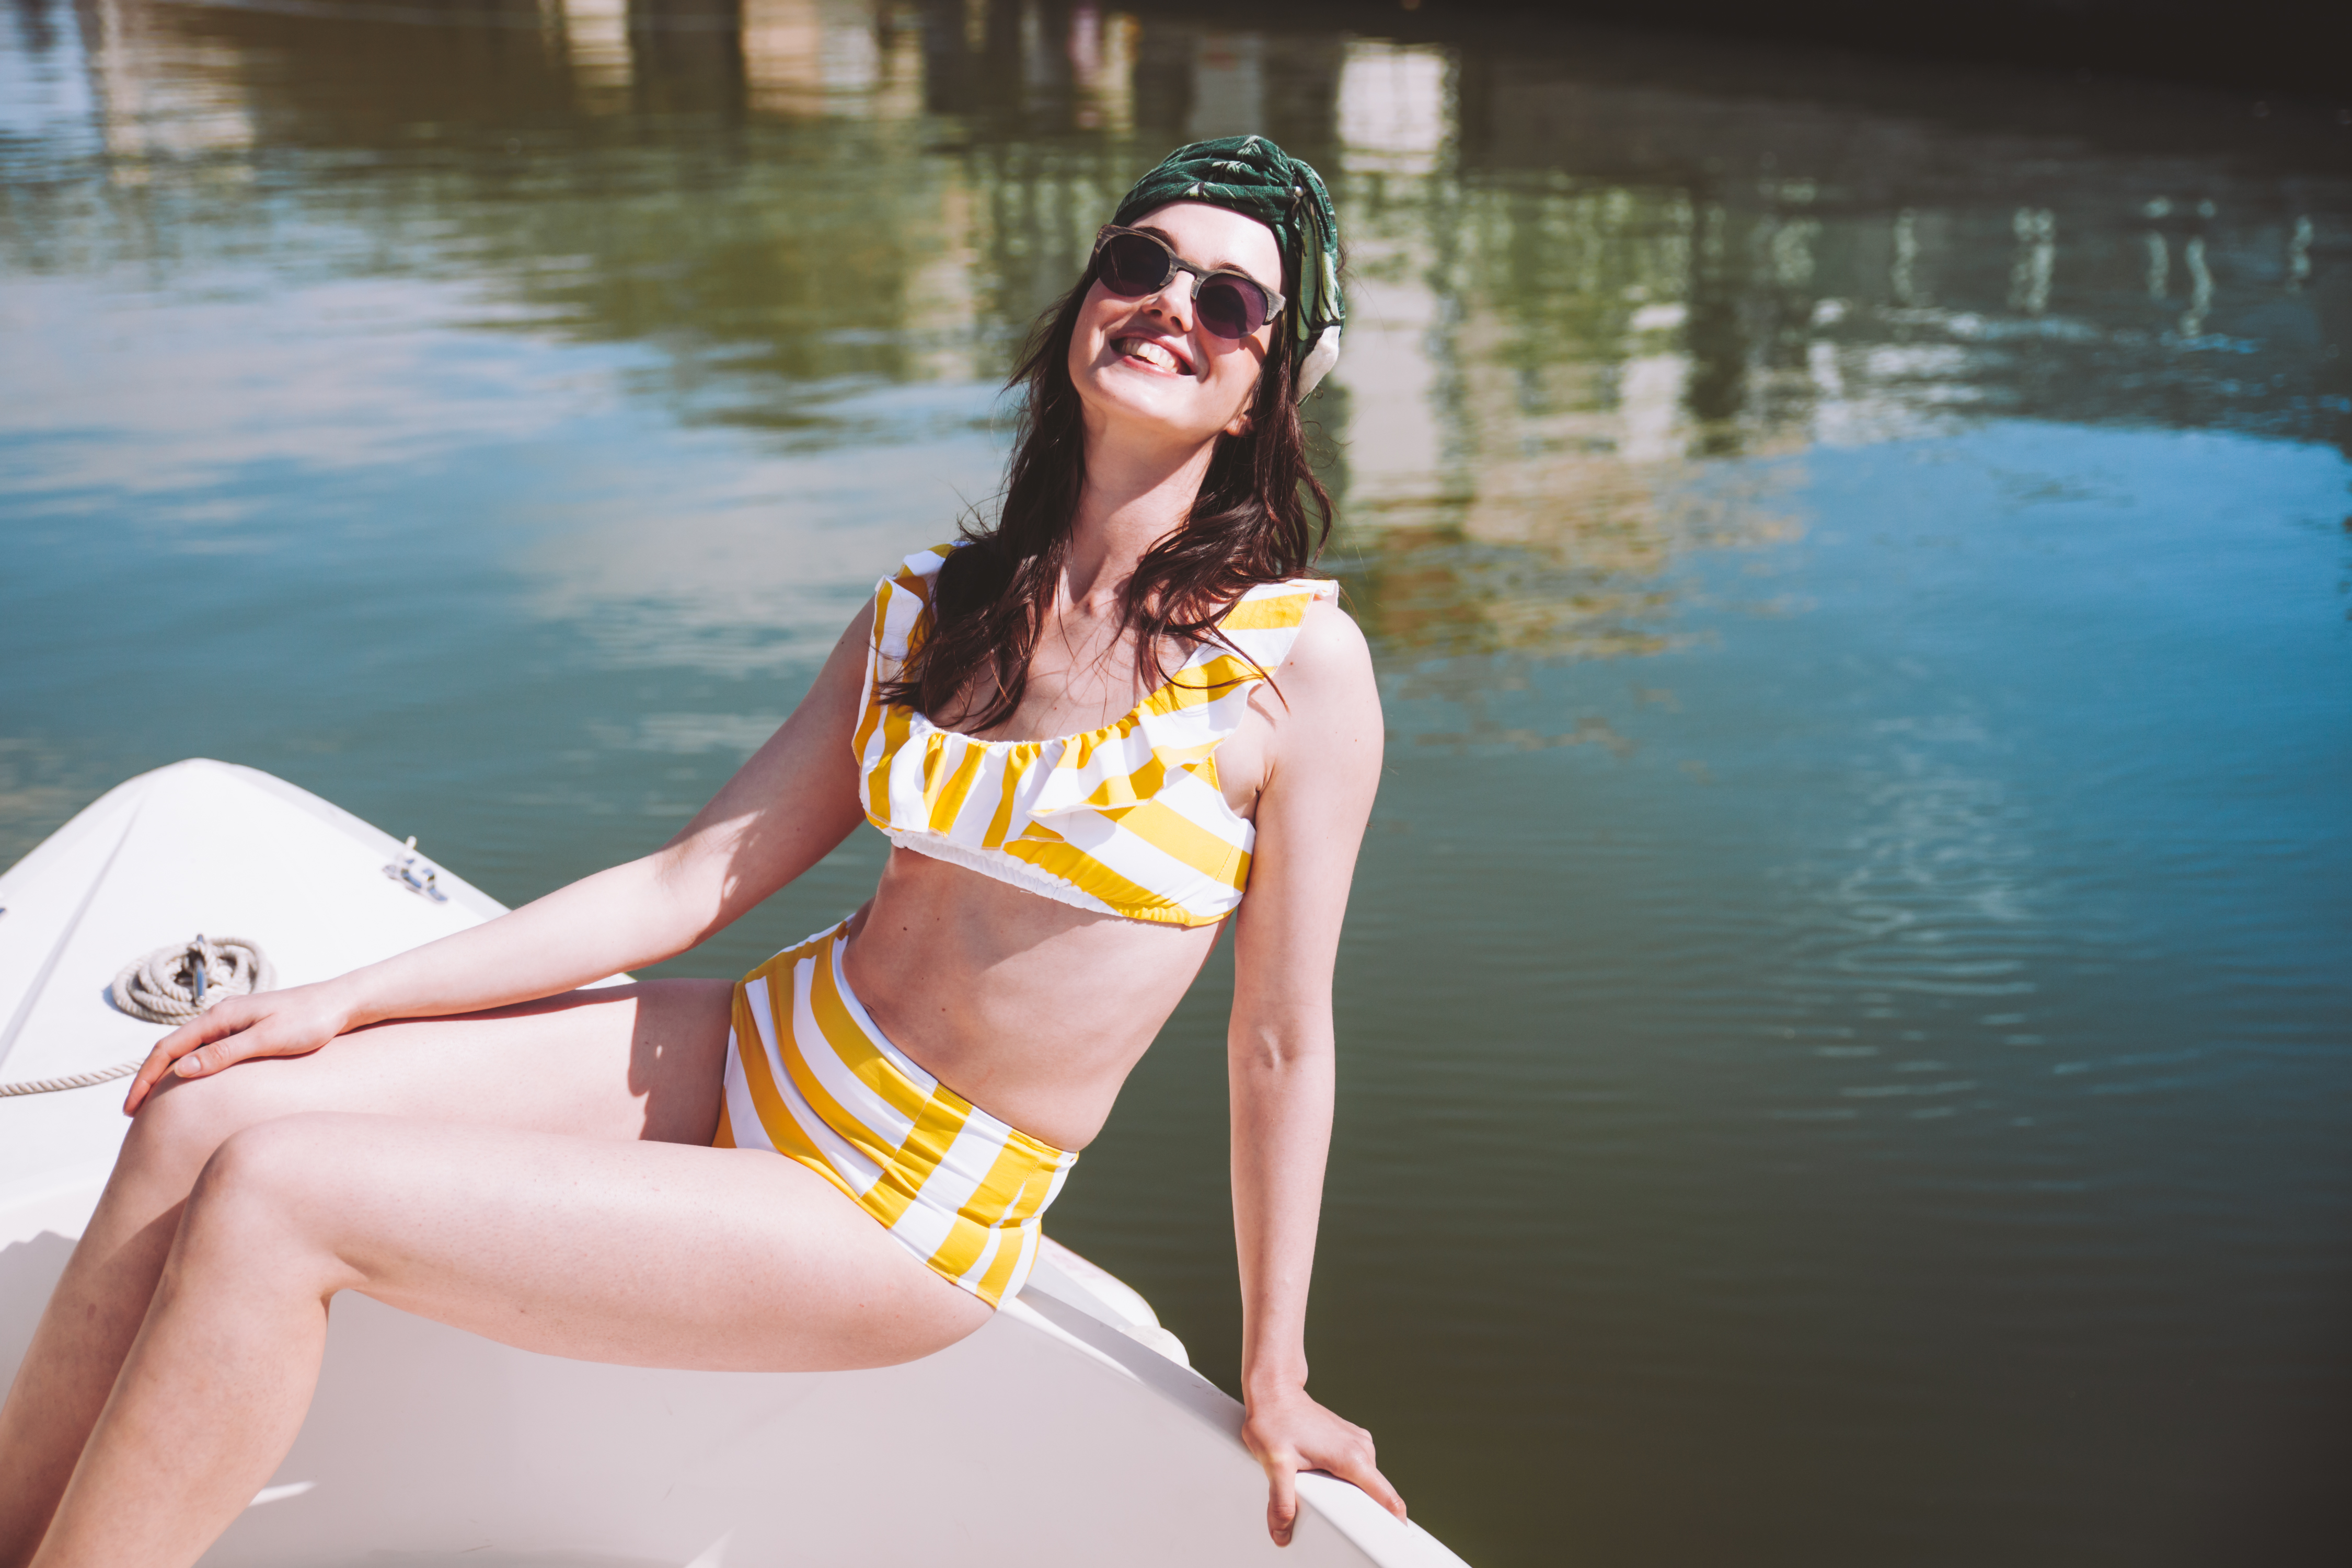
Hola everyone! Everyone at the office is so so excited because we have good news for you: the sun is shining (and we hope it’ll stay that way) and our Eva onepiece and Ursula twopiece bathing suits will be available on the eshop this Thursday. Save the date! When
NOO reached out to us to collaborate on these two swimsuits, we jumped for joy since we love the brand, the two talented designers and their amazing lingerie line! We wanted the best of our two teams, all of NOO’s lingerie savoirfaire and the Lemonade Studio’s citrusy flair. We needed the most flattering fit, perfect little details and the most amazing print. That’s how we came up with Eva and Ursula with a vintage, but not outdated, touch. The Ursula twopiece was difficult to design and prototype but the entire
NOO team understood what we wanted from the start, even if it was complicated... and Anaïs and Elissa from NOO do things right, they gave us the pattern for you to make it at home! So as a sneak peak, here’s a step by step guide to tide you over until it’s available in our eshop! Can’t wait for Thursday!
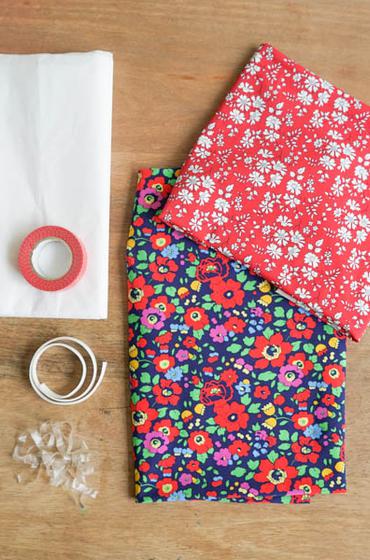
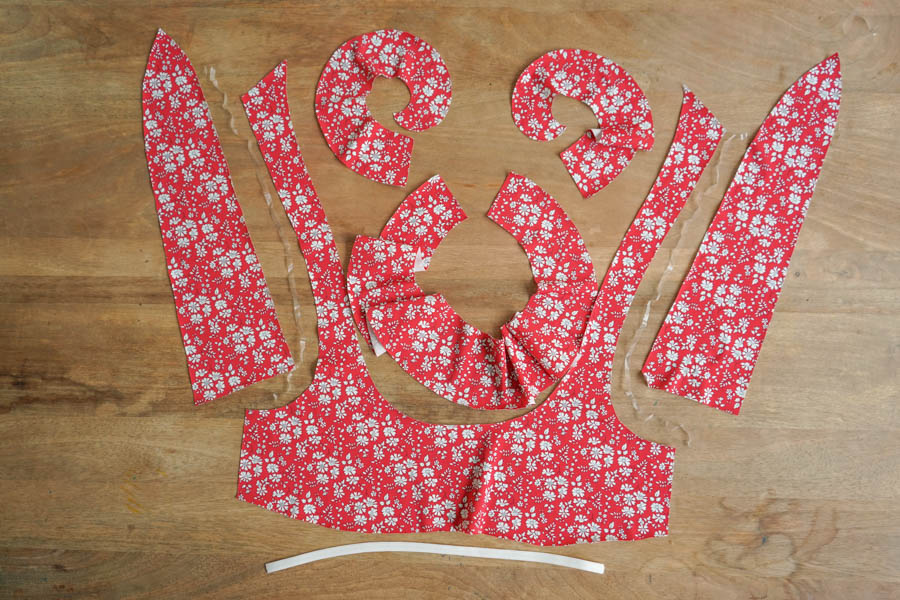
To make the Ursula bathing suit, you’ll need:
- 1m of lycra fabric, not too thick, from a bolt 1m40 wide, we found these Liberty prints at Motif personnel, the multicolored flowers here and their white flowers on red here,
- 0,45m of antislip band for the top (commonly found in a haberdasher’s/notions shop or even online)
- 1m of clear elastic band (this isn’t mandatory) also found in a haberdasher’s/notions shop or online
- Tissue paper
- Masking tape
- And our pattern that you can download here!
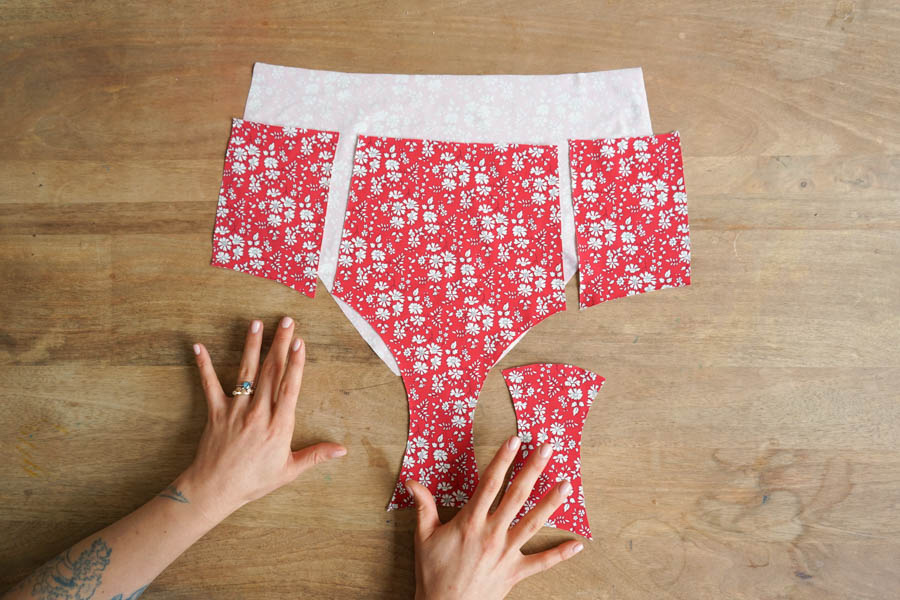
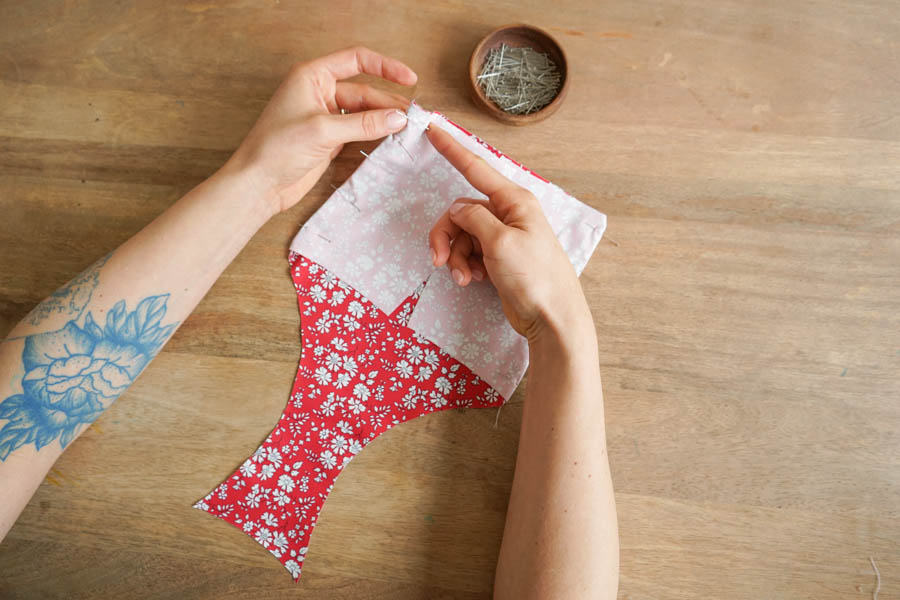
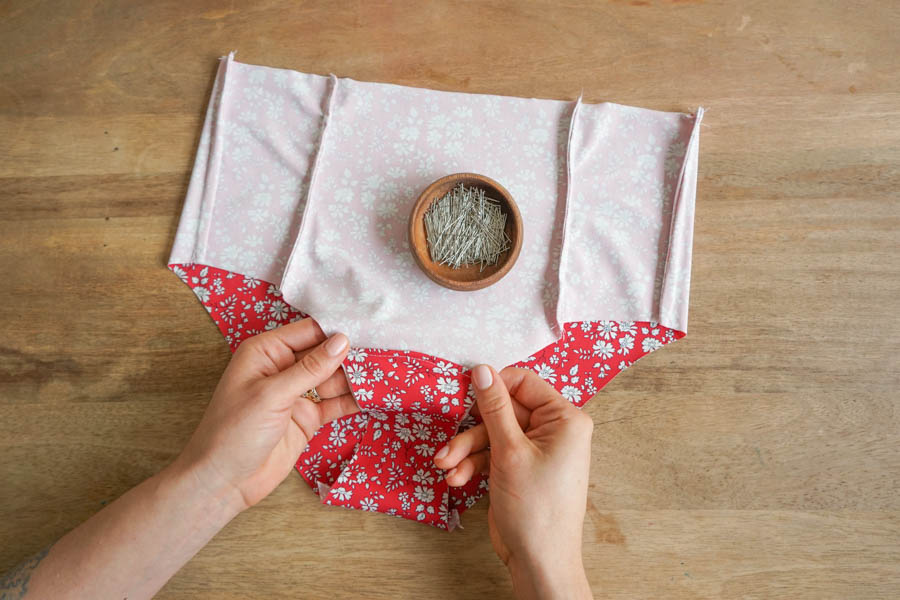
We’re going to start with the panty that’s made up of five parts, three for the front, one for the back and one for the bottom. Be sure to add an extra 1cm to the pattern’s outline that will surround the thigh. Start with the front of the panties, since we’re using a French seam, pin the sides in front, right sides together, and pin at 0,5 cm.
Turn the seam that you just made inside out and pin this time right sides together and stitch at 1cm. Take your backside and pin it in front. Made French seams too, pin right sides together, then turn inside out, pin at 0,5cm then turn inside out and pin at 1cm.
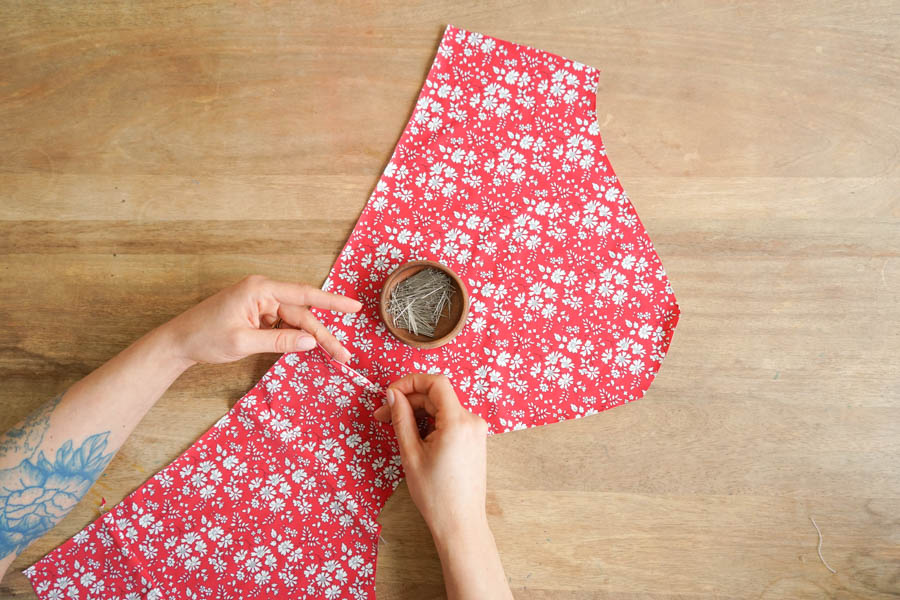
We’re now going to sew the bottom of the panties. Pin the front’s bottom with the panty’s backside’s bottom, right sides together. Pin on top of the edge of the back of the panties so that on this spot at the back of the panties is on top of the back of the backside of the panty (pictured right). Pin at 1cm.
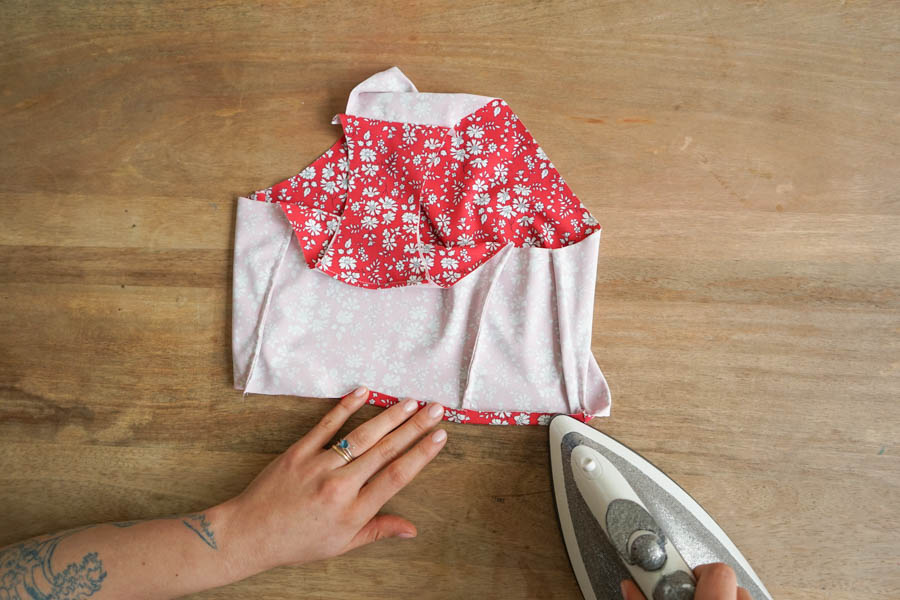
On the other side of the bottom of the panties, fold 1cm with an iron (be careful that it isn’t too hot otherwise the lycra might melt!) and stitch this fold on the front of the panties 0,5cm from the edge (pictured left). Also fold the belt 2x1cm with the iron.
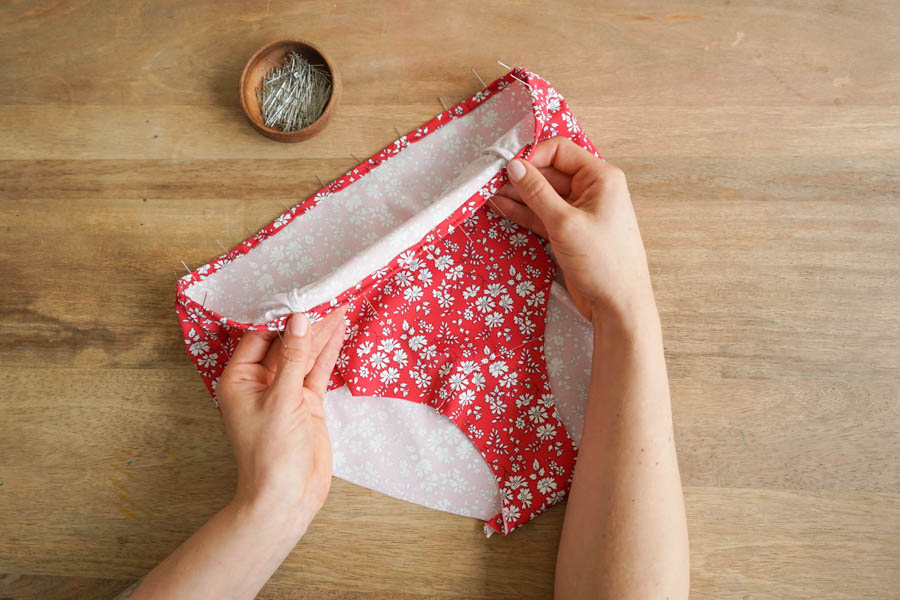
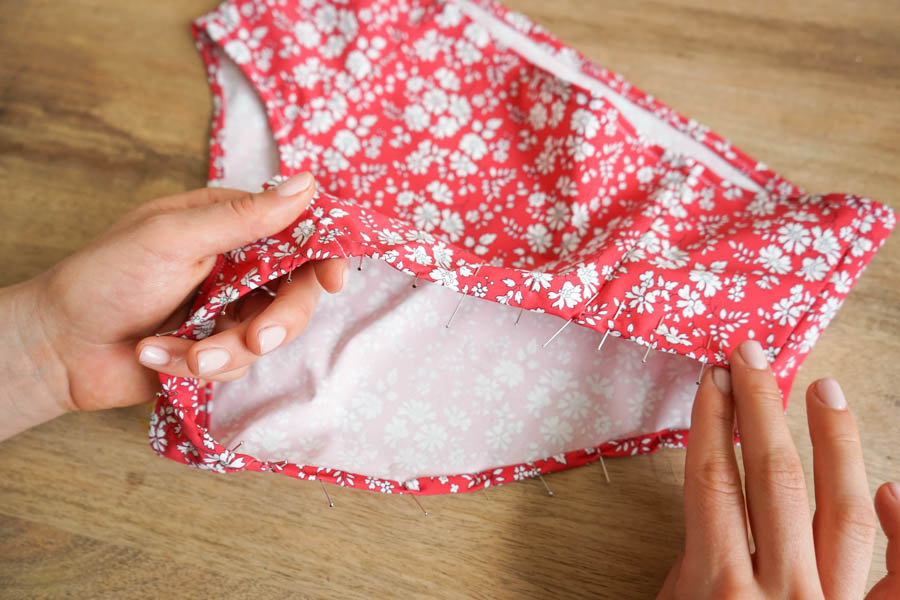
Pin and stitch at 0,75cm. Watch the tension of your thread and make wide stitches. You can also do a zig zag stitch for more elasticity or if you are lucky enough to have a twin needle, make a seam with that! Fold again 2x1cm and pin around the thigh too. Your panties are now done!
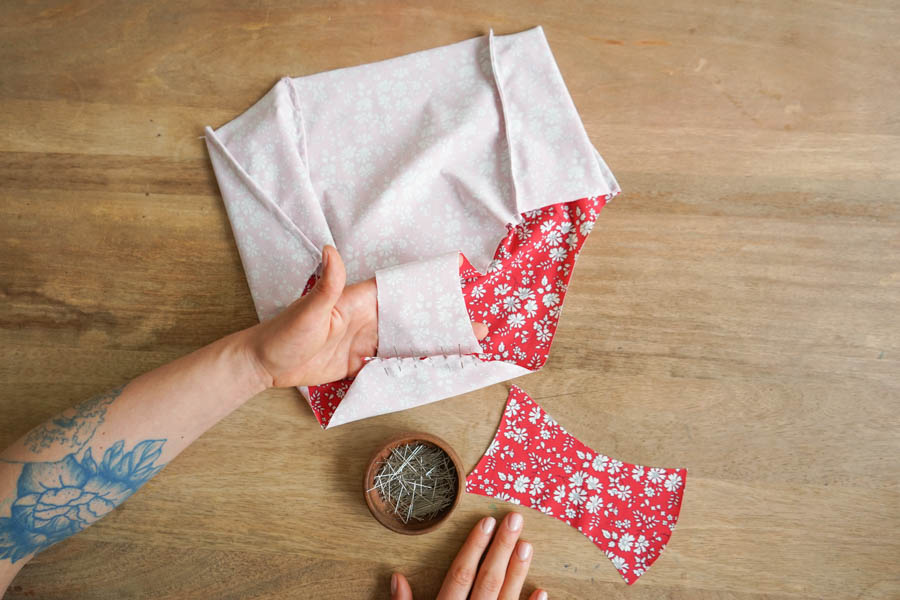
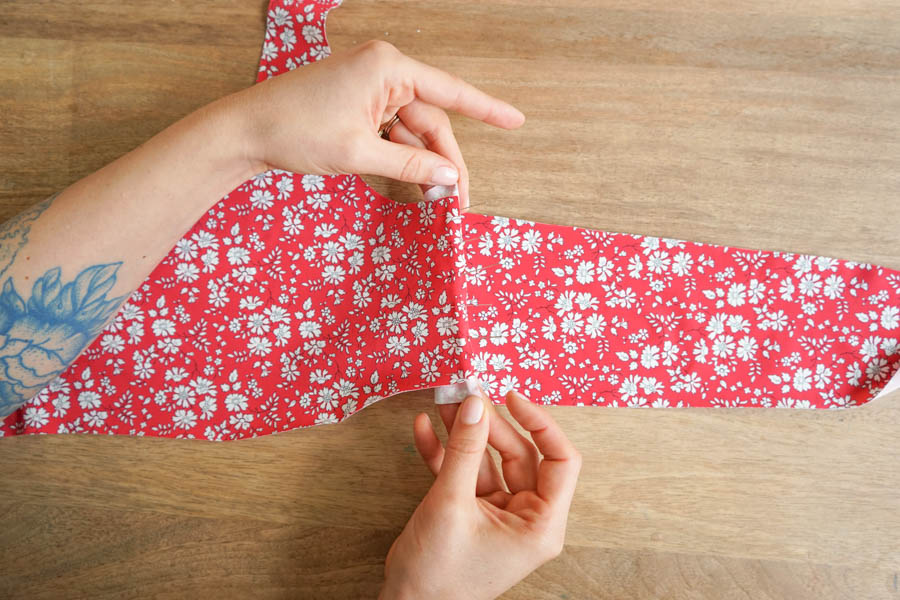
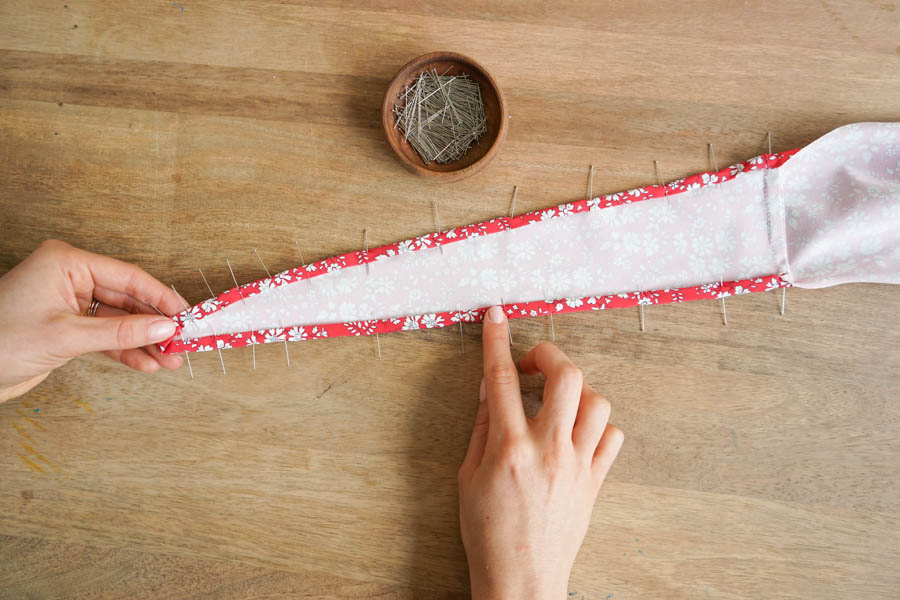
For the swimsuit top, you’re going to need a lot of pieces: 1 front, 2 strips for the back, 1 ruffle for the front and 2 ruffles for the back and don’t forget the clear elastic bands and antislip band. Grab the front and the back strips. Pin right sides together, exceeding the back strip by 1cm on each side (pictured right).
Fold the seam over and pin right sides together, then pin at 1cm. For those who want more support, you can slide a small, flexible plastic boning that you’ll have cut to the right length inside the French seam. Iron.
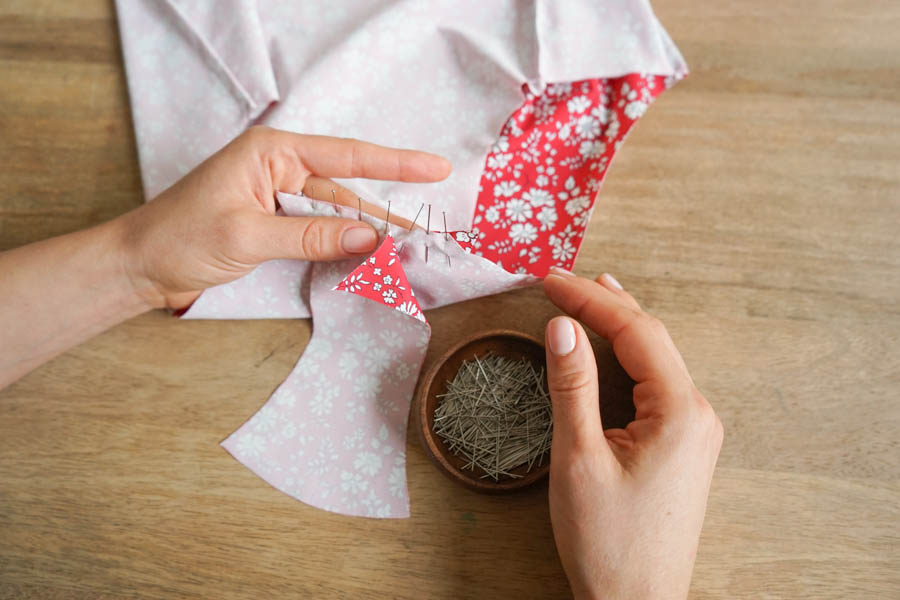
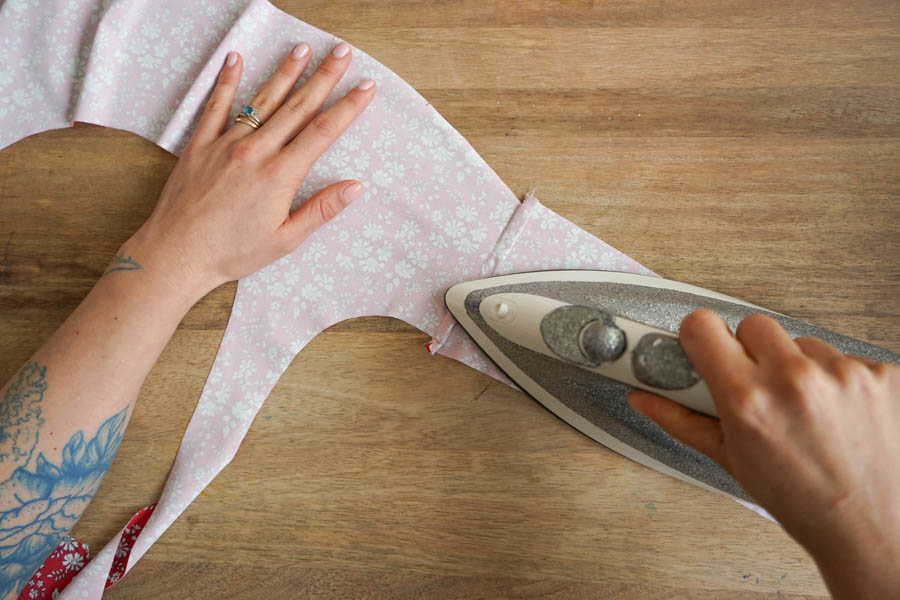
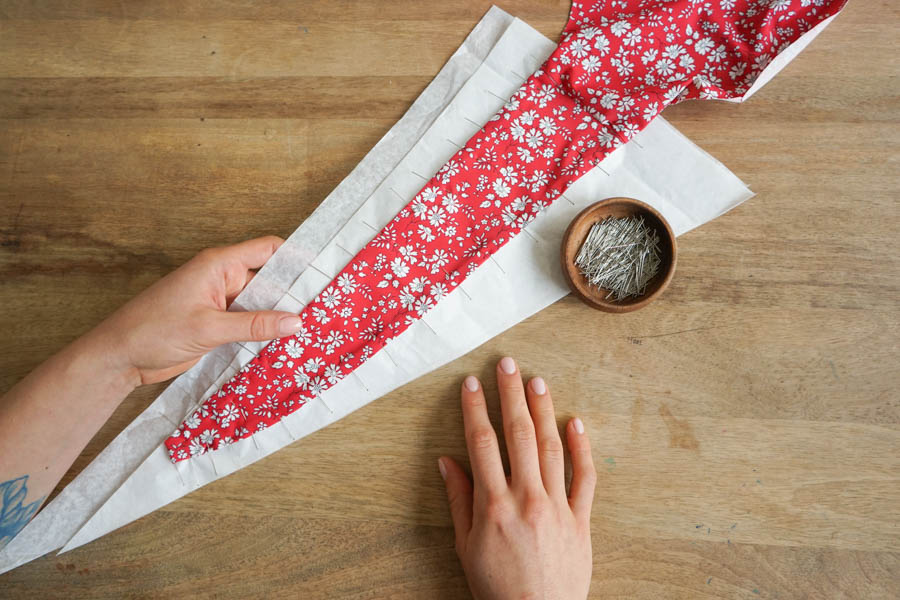
Fold over the back strip, 2x1cm. Don’t be afraid to do it twice while ironing and adding lots of pins since the fabric moves around alot.
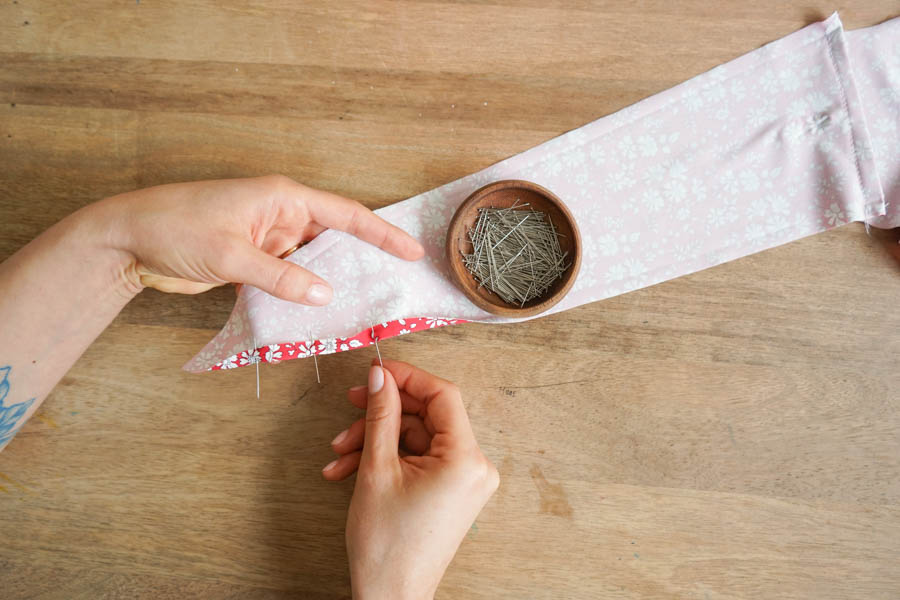
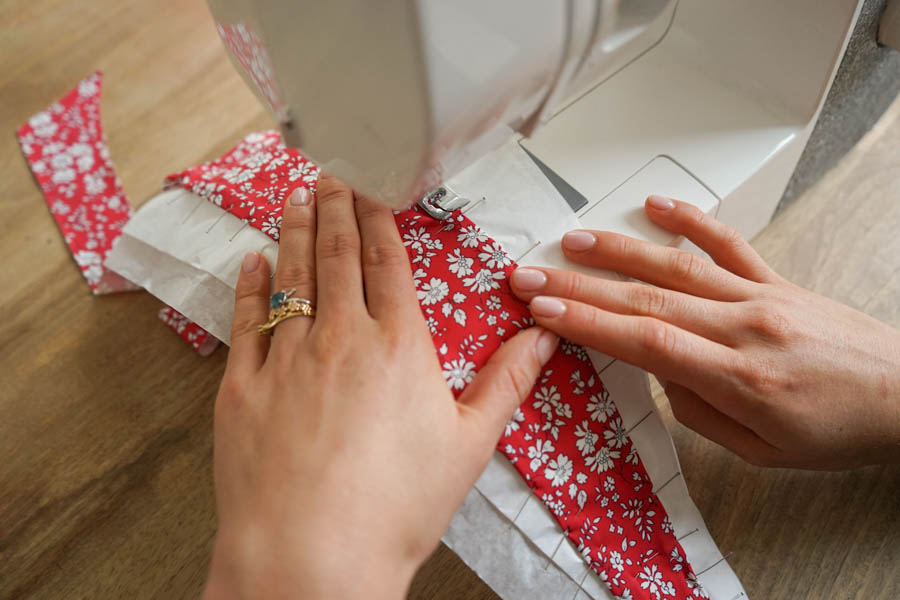
Then pin right sides together on tissue paper folded over 2 or 3 times. Straight, zigzag or twin needle stitch 0,5cm from the edge. Be careful with the zigzag stitch, taking out pins as you go.
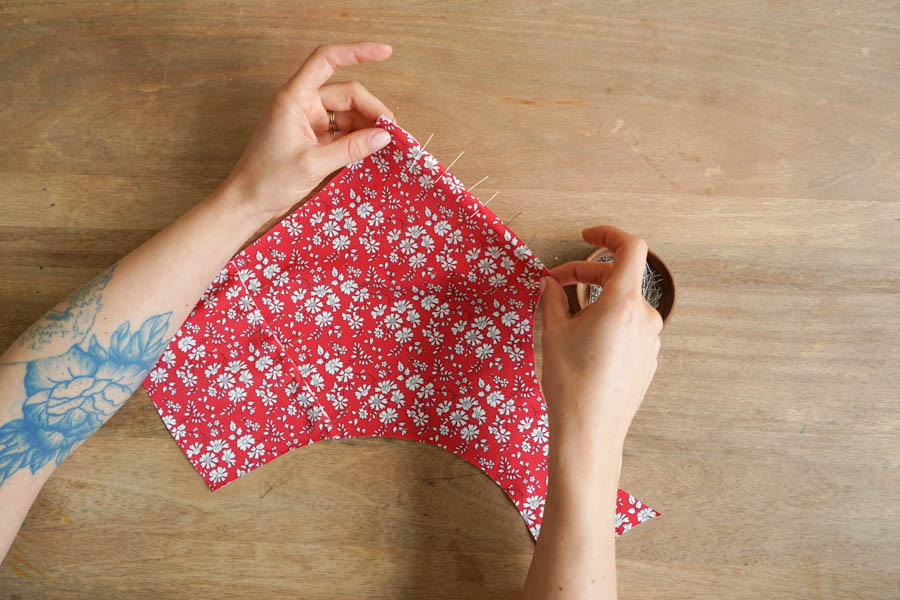
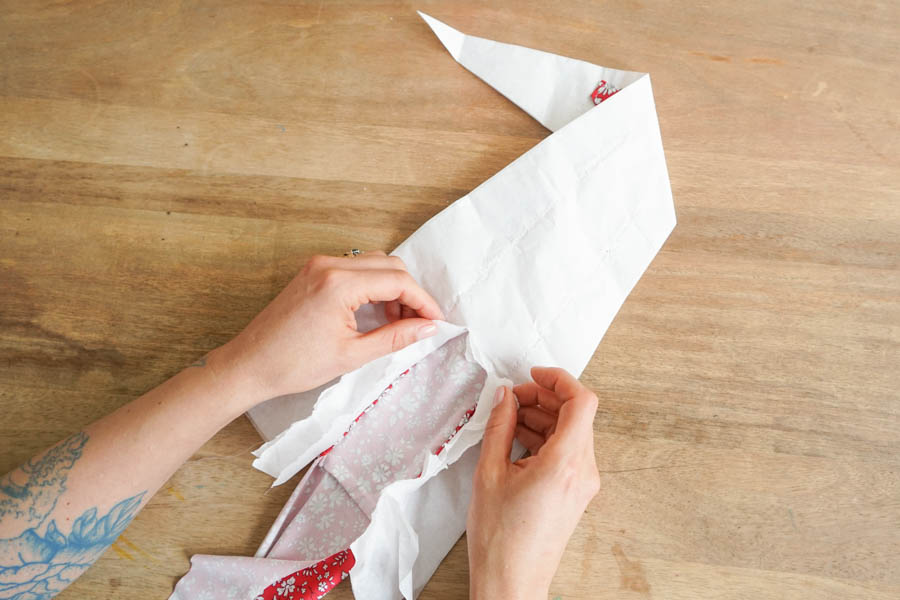
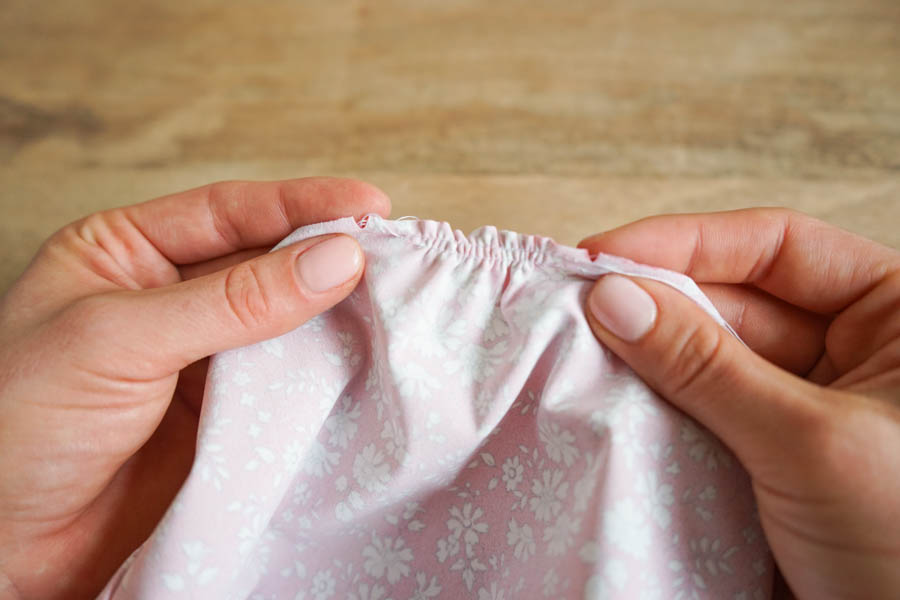
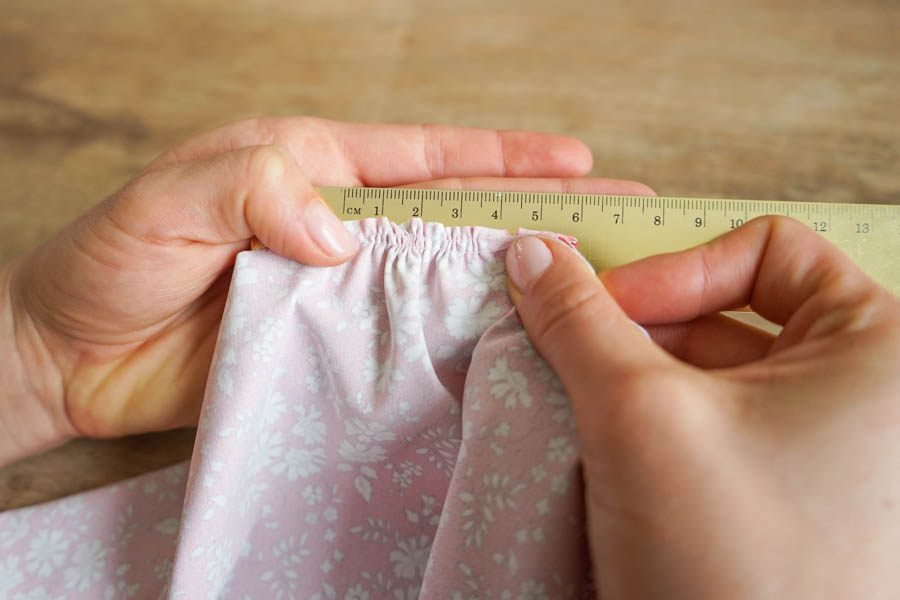
Take off the tissue paper, carefully tearing it. Move onto the front gathers. Pass two gathering threads between the notches noted on the pattern. There are 4 total notches, 2 for each breast.
The gathering allowance should be 4cm. Measure carefully between the two notches. Then fold the bottom of the bra 1cm (where the gathers are). Pin.
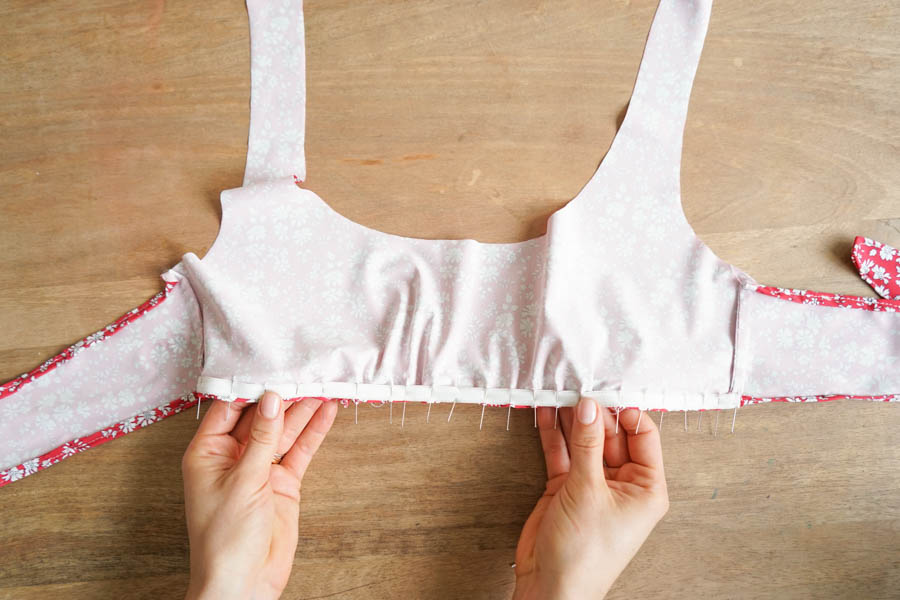
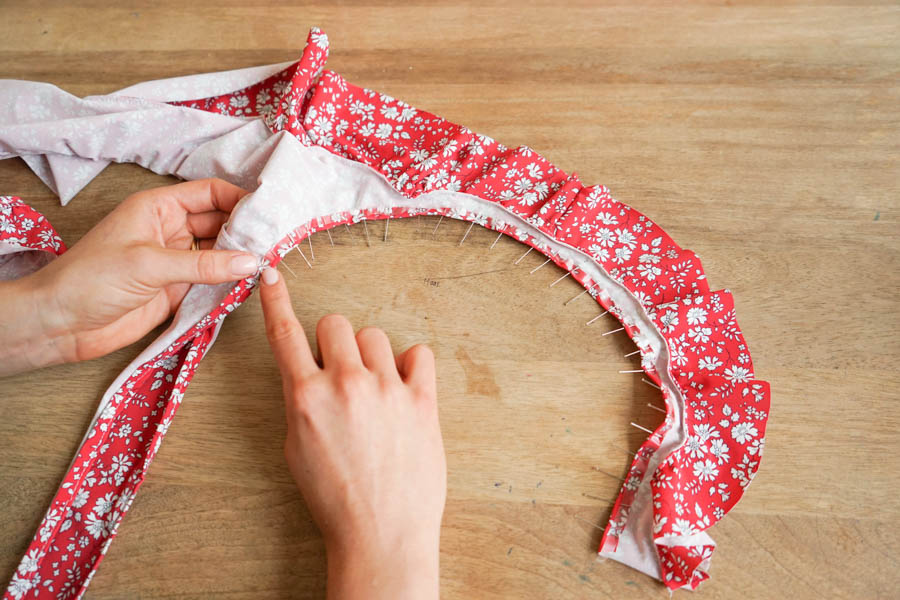
Cut the antislip band without pulling on it, being careful that it’s the same length as the bottom of the bra, from the seam on the left side to the seam on the right side. Hold in place with a stopping stitch with a sewing machine, on the level of each side seam! Then pin all along it (be careful not to pin the fine silicone band that’s in the middle of the antislip band).
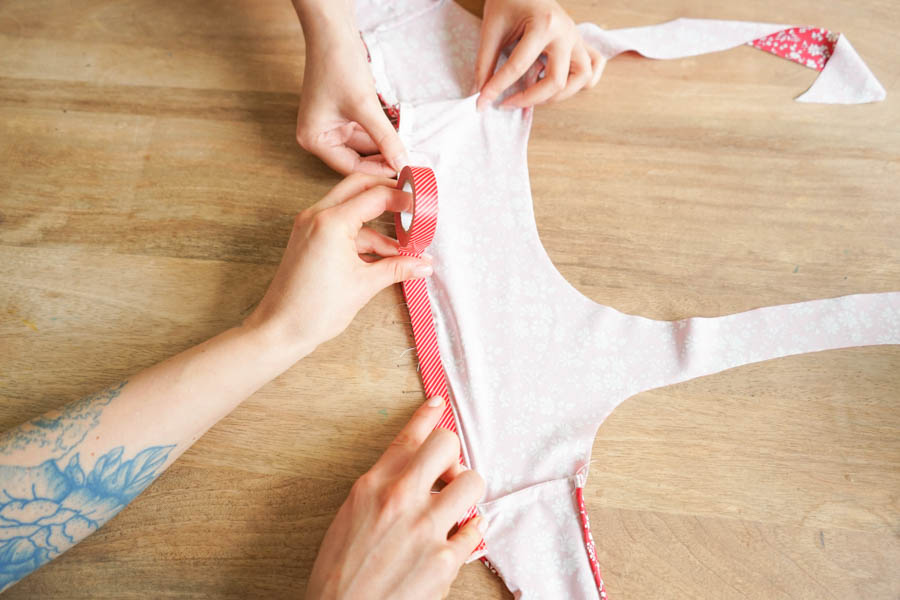
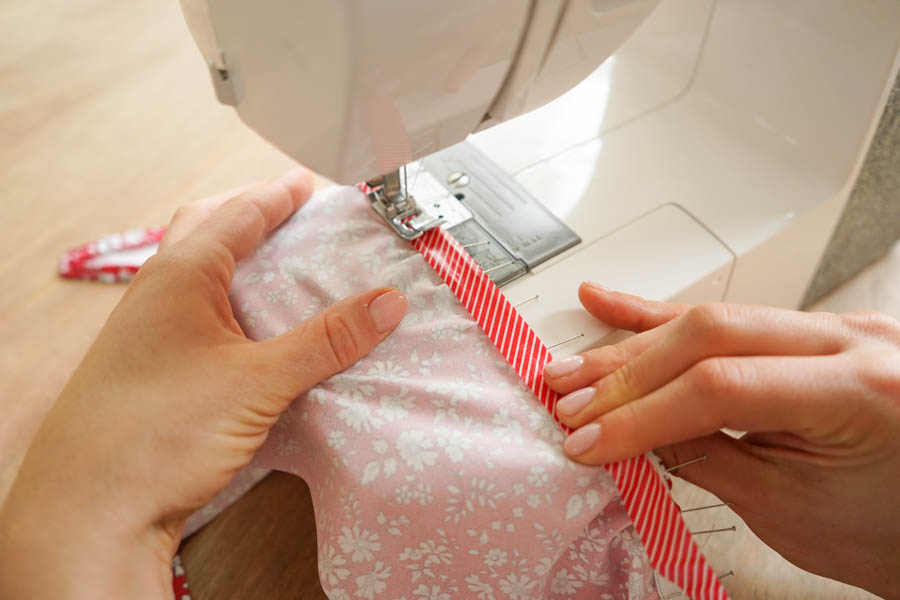
Pull on the bottom of the bra and tape using masking tape on the antislip band. This step will be easier if you have two extra hands! The masking tape will keep the bottom of your presser foot ‘sliding’ on the antislip band’s silicone and will add an extra layer, stiffening the lycra which will make your seams cleaner. Straight stitch a first stitch 1cm from the edge, then a second 0,5cm away.
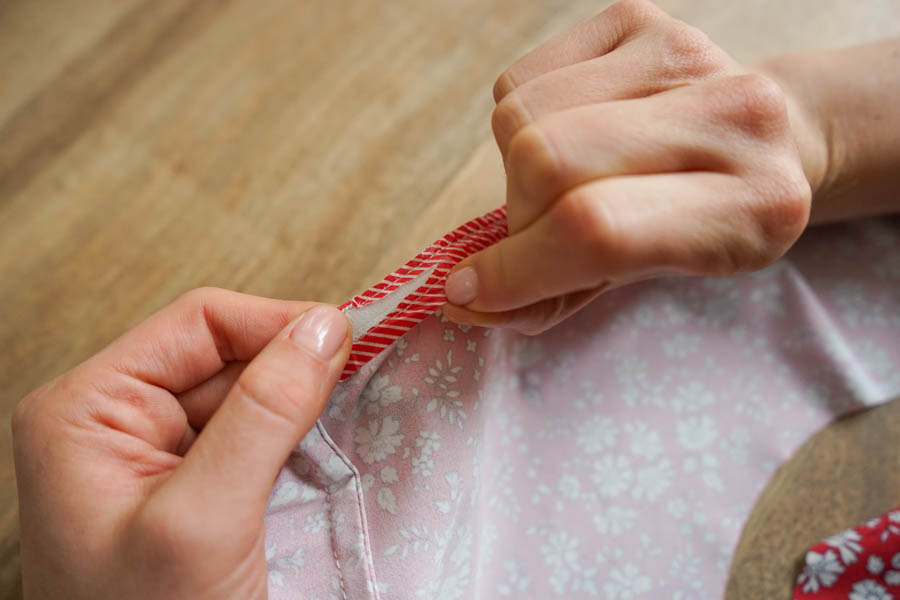
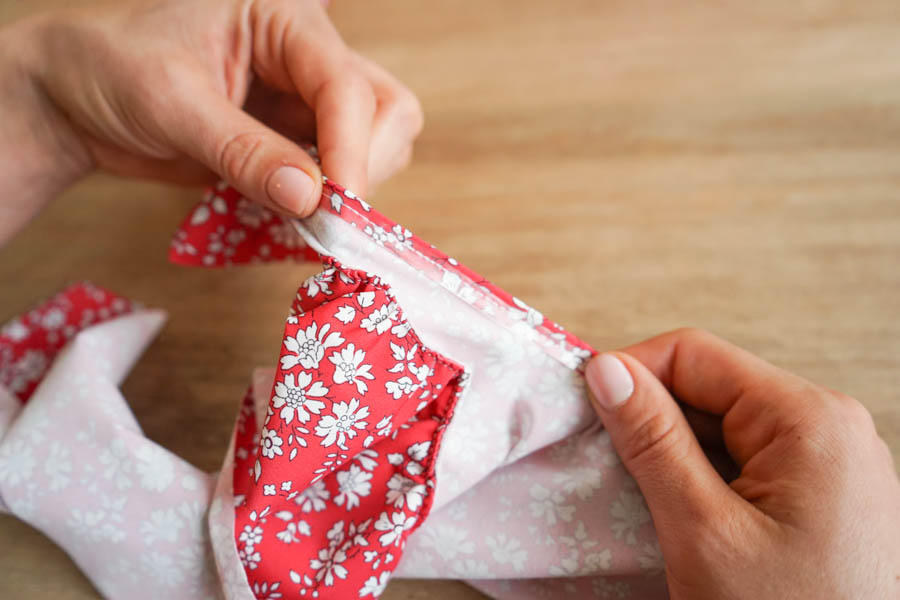
You can split the middle of your masking tape with small scissors or a seam ripper. Take it out gently, like you did for the tissue paper. Take out all the little pieces that may have stayed stuck.
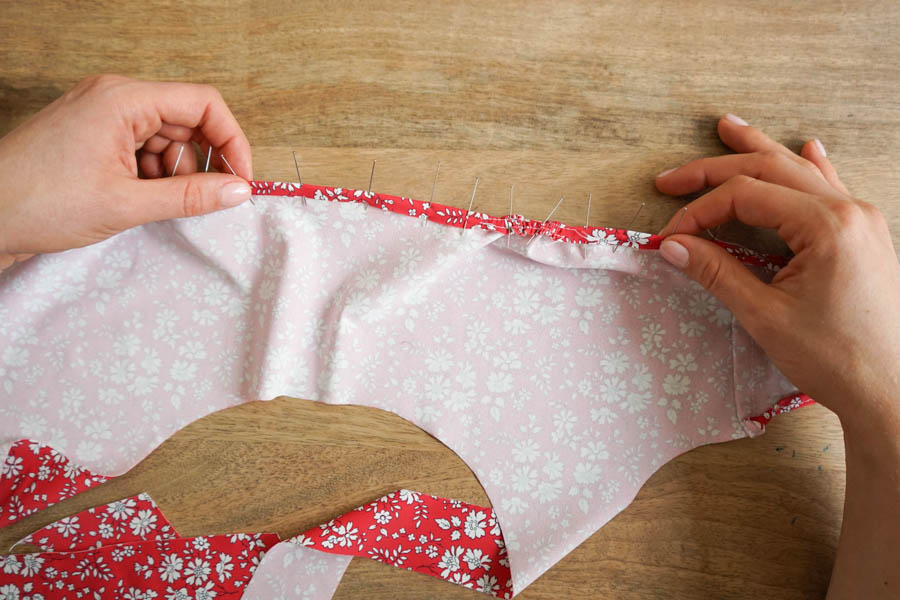
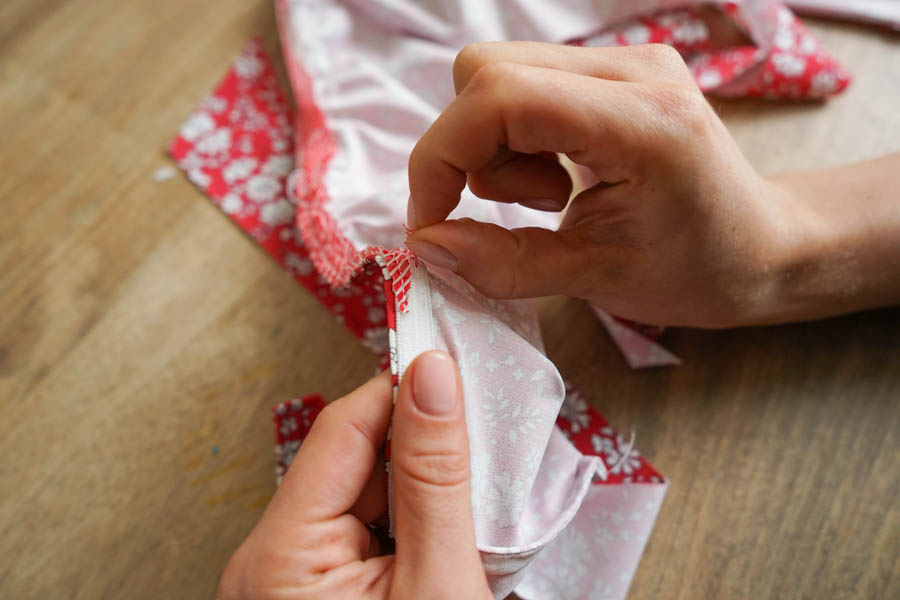
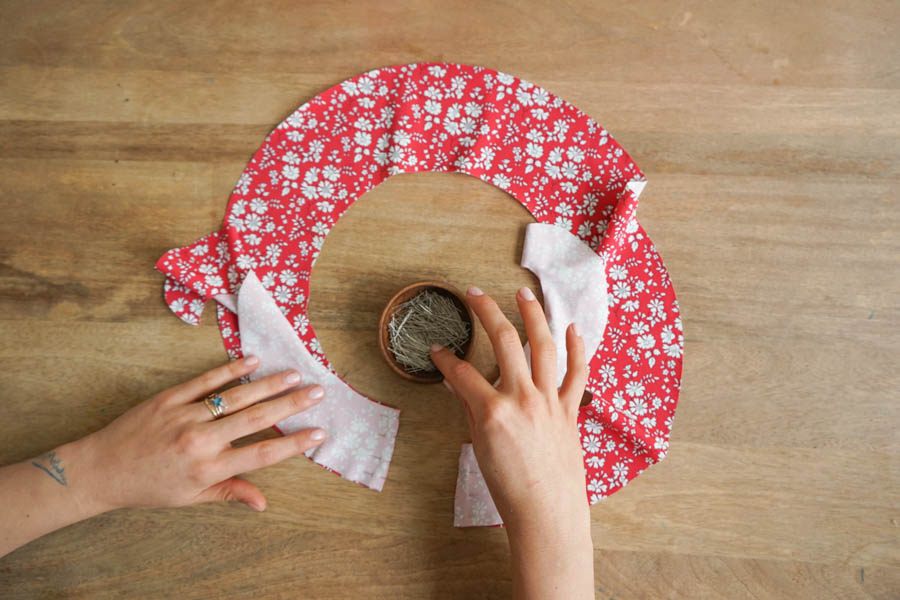
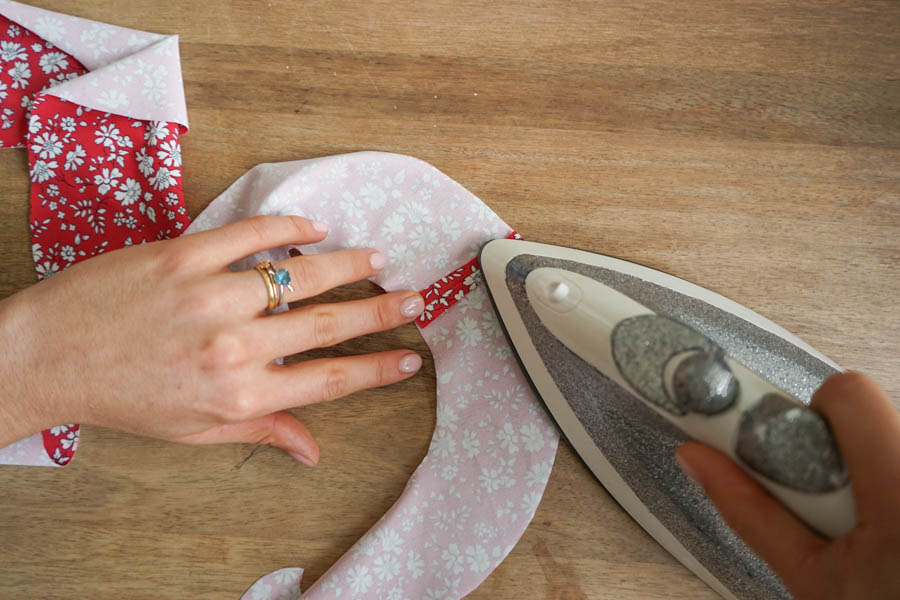
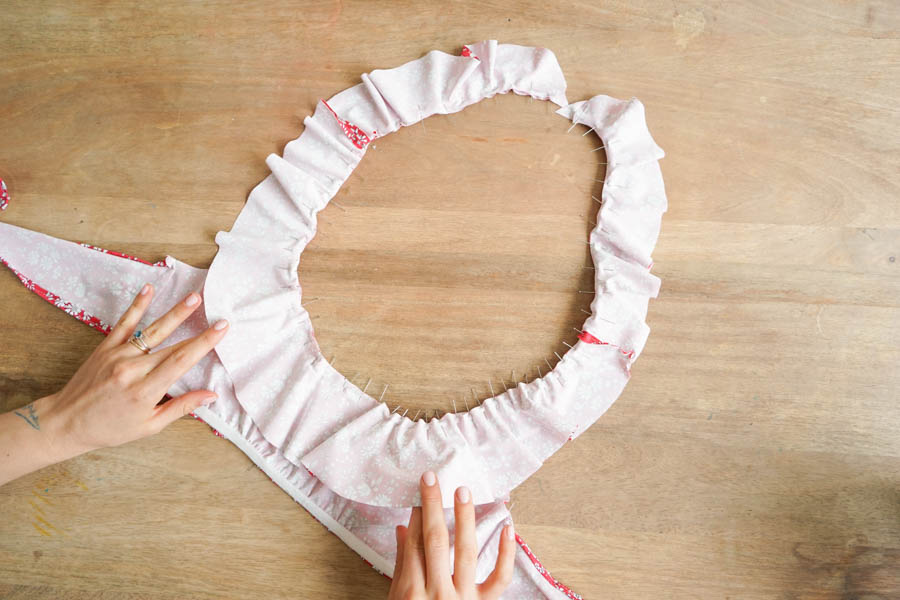
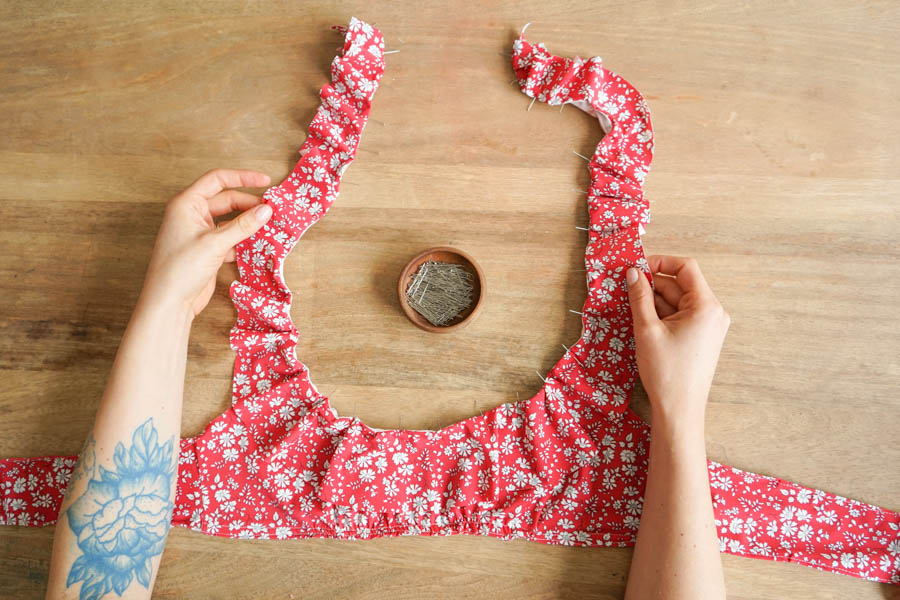
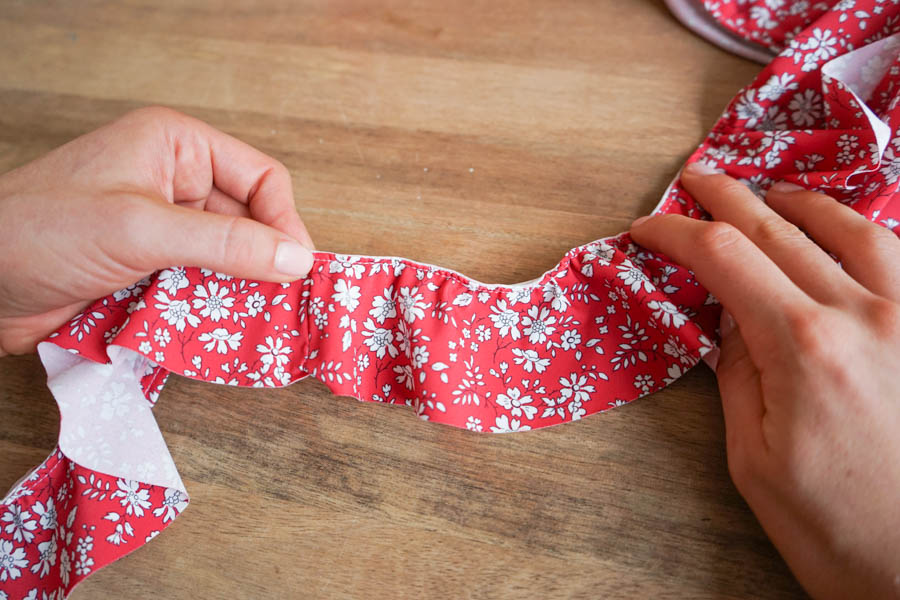
Move onto the frill. Pin the edges of the front frill, right sides together, to the edges of the back frill, making a large circle. Stitch at 1cm. Open the seam with an iron.
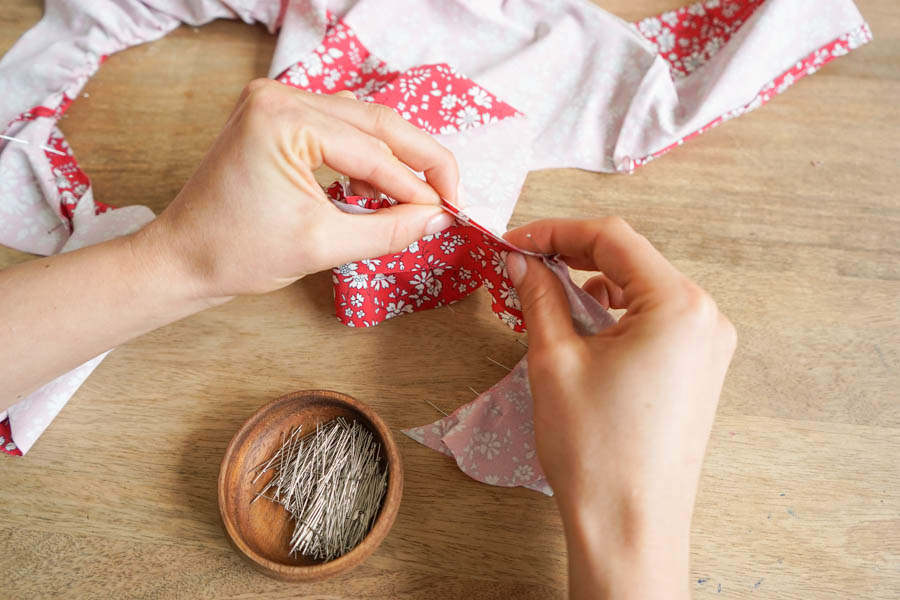
Pin the front of the frill to the back of the bra leaving 1cm loose at the strap. Line them up center front. It’s normal for the frill to be bigger than the bra, don’t worry. Make more folds in front (pictured right). Pin at 1cm.
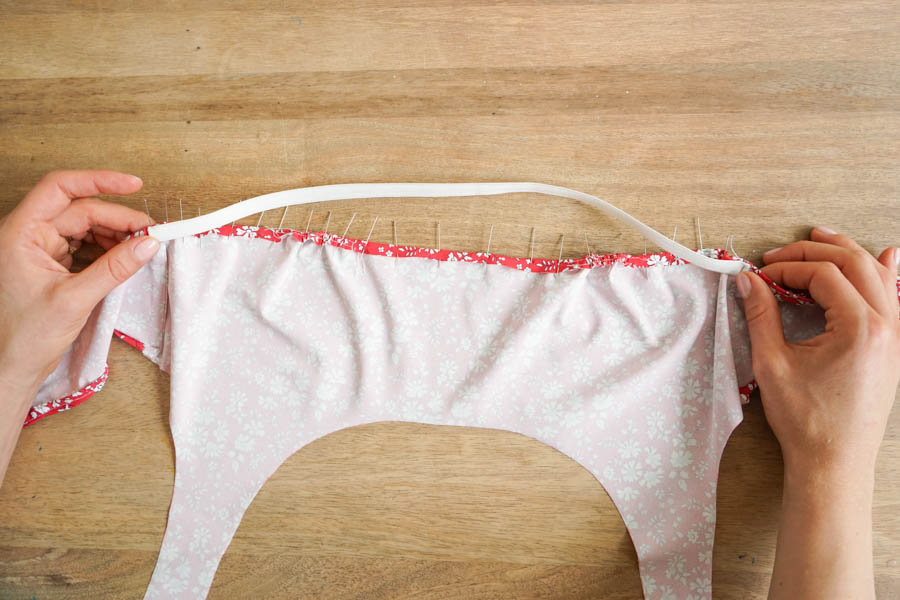
Turn around so that the frill is placed in the right spot, then edge stitch so that the frill goes towards the bottom (pictured left). Let’s move on to the armhole. Pin the clear elastic band all along the armhole, from the bottom of the strap to the side seam. Be careful that the pins don’t ‘go through’ the clear elastic band but are just above it.
Pin at 0,5cm so that the stitch holds the clear elastic band in place.
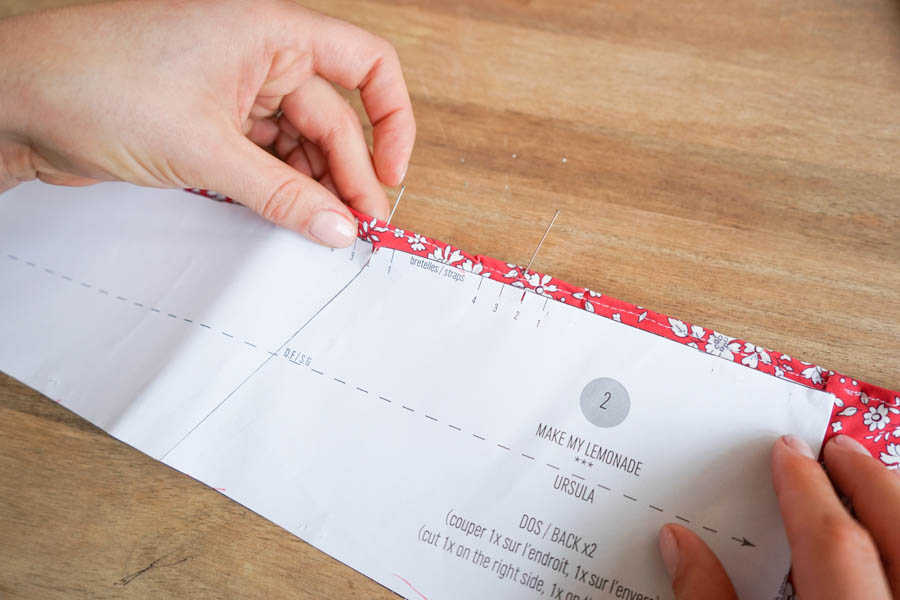
Go back to the pattern to mark the spots to put the straps on the back strips. Pin the straps, making 1cm folds. Stitch so it’s held solidly in place.
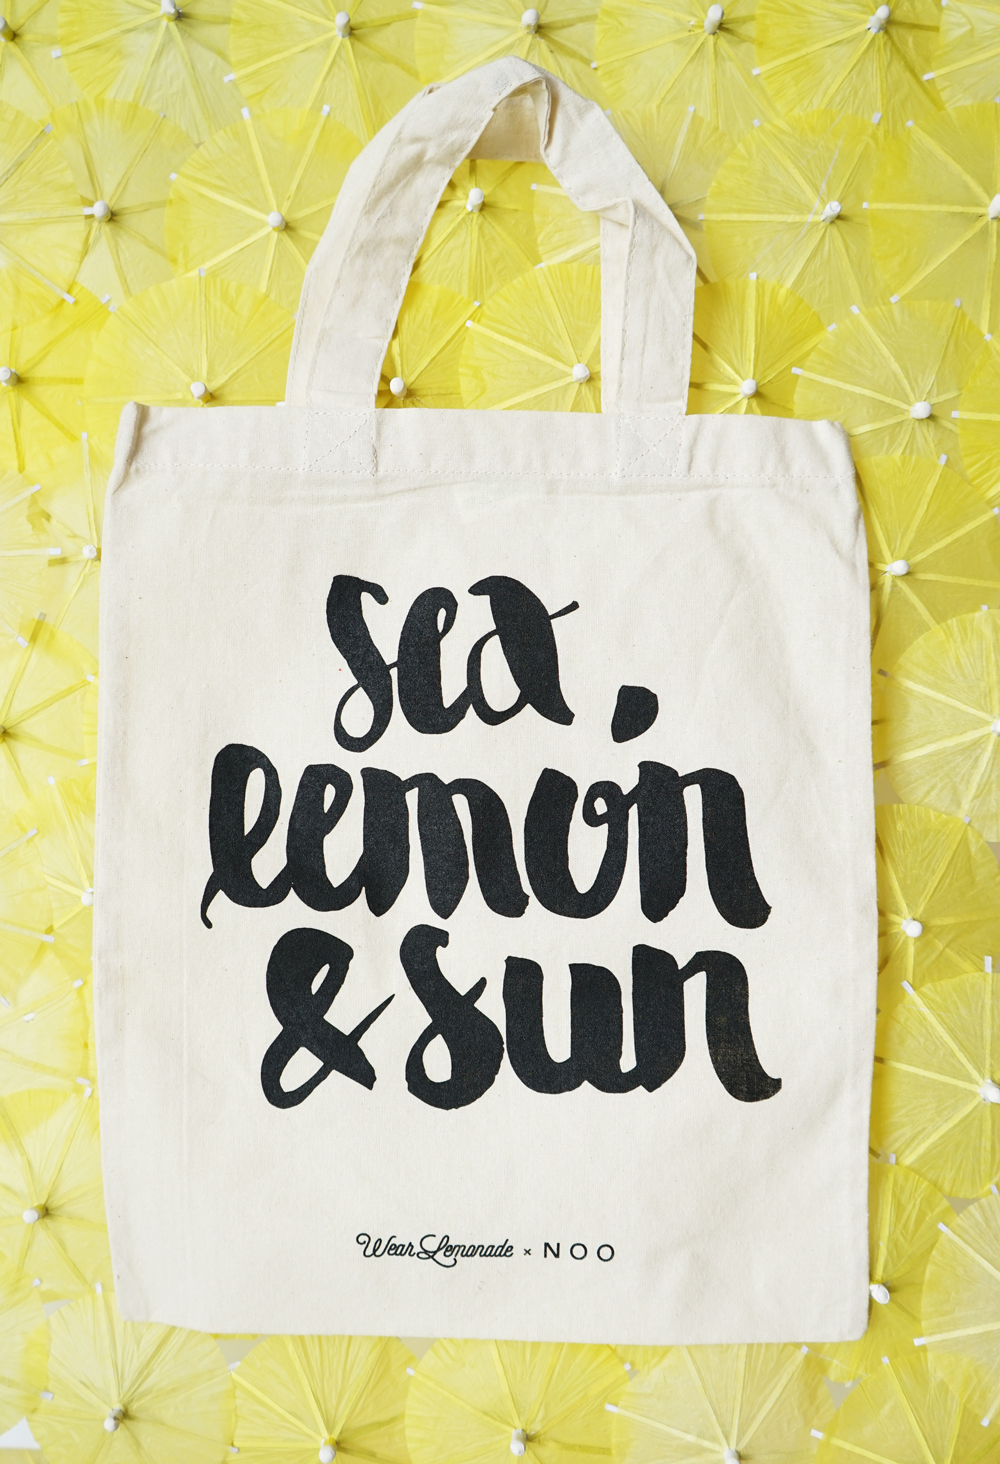
And here’s a sneak peek at the totebag that’ll be included in your swimsuit order, starting on Thursday on
WearLemonade.
[:]